Tuesday, January 24, 2023

What's the difference between the ImPRESSive Putty MIX and the ImPRESSive Putty?

What's the difference between 

the ImPRESSive Putty MIX and 

the ImPRESSive Putty?


Both are the same except for the initial form. The ImPRESSive Putty MIX needs to be heated prior and MIXed prior to it's first use. The ImPRESSive Putty (no mix) is already mixed together and you just heat and press. Both are the exact same material. After you mix the MIX it can be re-melted and re-used as many times as you like to make lots of different mold shapes just like the pre-made ImPRESSive Putty. You do not need to add anything to either. 


Can I use my regular dishes to heat the Putty? 

Yes, the ImPRESSive Putty is food contact safe. This will not damage any plates or dishes. If you have any on, just wipe it off or wash it away with hot water.


Please share this and tell everyone you know about ComposiMold! Plus subscribe to see the next amazing blog post from ComposiMold!


Monday, November 9, 2020

Making Molds is Super Simple and Low Cost With a Reusable Molding Putty

Tuesday, June 18, 2019

Lowest Cost Mold Making. Geeky Jewelry I Love Pi Necklace


Here’s  a cute geeky “I Love Pi” necklace. www.composimold.com

We’re going to make this into a red necklace and also a glow in the dark necklace.
The shape is printed on a 3D printer. Place your jewelry in a mold box. Anything will do. I’m recycling a plastic container. Aluminum foil also works well. Use hot glue or a piece of clay to hold down your object.
Spray your part with Bubble Buster to reduce surface tension so the bubbles will escape. I didn’t have to but some 3D prints are very porous, so you might need to seal the part with shellac or white glue. 

Melt the ComposiMold in the microwave for a minute or so depending on how much you need. Pour the ComposiMold as it starts to cool. You want it to be a thick honey-like pourable rubber for best results. If it’s too hot to handle it’s too hot to pour, so let it cool.

Don’t worry about how you pour it. Fill up over your part. Let it cool. Put it in the freezer to solidify faster.

Pull out the mold and the original. Mix up the resin, add colorants if you like. The first casting we’re making is a red pi necklace. The second one is a glow in the dark necklace. Maybe we could also make this with thermochromic colors to change colors at different temperatures. 

We’re making this resin necklace with a reusable molding material called ComposiMold. It works great with the ComposiCast Epoxy Resin and the molding material can be remelted to make over 35 different molds. Yes, 35 custom molds. Any time you want. 
This ComposiCast Epoxy Resin has a working time of about 45 minutes and cures in 10 to 14 hours.

Let the resin cure. Pull your resin jewelry out. Tada. Clean up the edges and you have the your I love Pi Necklack. 

You can make another necklace, or remelt the mold to make a new shape. How many shapes? Way more than 35 custom molds you can make yourself. No extra money. No extra material. 

The molding material is non-toxic. Have fun. Experiment. And subscribe to our channel for more cool videos.

Thank you and enjoy.
Stan


Please share this video and tell everyone you know about ComposiMold! Plus subscribe to see the next amazing blog post from ComposiMold!


Wednesday, June 5, 2019

How to Make Toys Easy -Zombie Head


Zombies are cool. And this Zombie is...maybe not as cool. Is that a dress? Maybe. Here's an example of making a shape with a 3D printer, making a mold with ImPRESSive Putty and Casting with ComposiMold Epoxy Clay. With special effects...okay...no special effects. Just how to make one yourself.


Please share this video and tell everyone you know about ComposiMold! Plus subscribe to see the next amazing blog post from ComposiMold!


Friday, May 31, 2019

COMPOSIMOLD EPOXY CLAY DEMONSTRATION EPOXY PUTTY FOR ARTS AND CRAFTS


ComposiMold Epoxy Clay is a premium slow cure self-hardening art and craft modeling
compound that gives you several hours of working time to sculpt, form, and mold
your artistic creations. The ComposiMold epoxy clay is a soft, but firm polymer
clay used for creative applications such as sculpture, wood restoration, model
making, and casting. It has the feel of a typical non-hardening polymer clay,
but it has the advantage of hardening to a strong plastic.

To use, mix each part together in equal amounts. One
advantage of our epoxy clay is the range of mixing that will still give
excellent curing and finished hardness. You can be off by 10 to 15% and still
cure properly. The most important part is to make sure the two parts are mixed
thoroughly. Spend 2 to 4 minutes mixing and kneading the putty together.  You have 1 to 2 hours of working time to create your shape. Cure occurs in 14 hours, but give it a full 24 hours to
completely harden.

You can sculpt it, press it, or mold it. The epoxy clay is
extremely well suited for use in ComposiMold’s ImPRESSive Putty, reusable
molding materials that can be reformed by reheating. We’ll show you how each of
these molds shown here were made in separate videos. So be sure to subscribe to
watch.

You can color the epoxy clay using acrylic paints.
ComposiMold carries a wide range of different colors that are designed
specifically for our epoxies. These colors are very concentrated so you only
need a little bit to create deep opaque colors.

The epoxy clay is a strong, hard plastic, but it is designed
for arts and crafts. It is not suitable for any load bearing applications. The
cured finished clay can be sanded, drilled, or machined. To paint, first paint
with a primer and then you can paint with oils, acrylics, or other paints. If
you want to have the epoxy clay outdoors, we recommend sealing it with shellac or
urethane spray.

Thank you for watching. Please let us know what questions
you have, subscribe to our channel, and leave comments below. For more
information on all of our Products visit ComposiMold.com.


Thursday, March 28, 2019

Quick Demonstration Countertop pour with ComposiCast and Colorants

Here's Shawn with a quick demonstration of how to make an epoxy countertop using ComposiCast resins and colorants.


Please share this video and tell everyone you know about ComposiMold! Plus subscribe to see the next amazing blog post from ComposiMold!


Monday, March 11, 2019

How to Make Art Dots Mandala Jewelry, Nadines Mandela Necklace


Mandala Art Dots. This video shows you how to make various jewelry with ComposiMold products. Thank you to Nadine. In 15 minutes you'll be ready to make your own molds and watch how she paints the Art Dots jewelry.


Please share this video and tell everyone you know about ComposiMold! Plus subscribe to see the next amazing blog post from ComposiMold!


Thursday, November 8, 2018

Melting ComposiMold

How to Melt Your ComposiMold or ImPRESSive Putty when you don’t have a Microwave
The microwave is usually the fastest, but it's not the only way to melt ComposiMold or ImPRESSive Putty. Here's a few other ways.
Heating Reusable Molding Putty
    1.Double Boiler: A double boiler consists of one container inside another container with water between them. The purpose of the double boiler is to keep the heat from getting above 212 F. Marbles or rocks work well to keep the ComposiMold container off of the bottom of the pot. If the ComposiMold container is on a stove top directly, the container will melt. Heat the resin until it is melted.
    2.Heat in oven a 160 to 180 F. DO NOT GO ABOVE 200 F.
    3.Heat gun for smaller molds. A heat gun is also a way to fix areas of a mold. By heating just one spot, you can melt that area and re-form it. This works with both the ComposiMold and ImPRESSive Putty.
    4.Chocolate melter: melt on melt setting, but turn it down after it’s melted
    5.Slow cooker. A slow cooker is a great way to keep the ComposiMold warm throughout the day. This is especially nice for classrooms and Maker Spaces. Use a ladle to scoop out the ComposiMold as needed and then just throw your molds back in to melt after you’re done.
    6.And if you’re in the middle of the woods with your ImPRESSive Putty and you want to make a mold to fix your tent or backpack buckle, place the ImPRESSive Putty in a SEALED plastic bag and place the bag in hot water. A 1.5 ounce size of ImPRESSive Putty will soften in boiling water in about 5 minutes. Be careful not to get water into the molding putty, and be careful not to get burnt.
    No matter how you melt it, try not to have it go above 200 F. If it’s boiling, you’re overheating and over time it will make the ComposiMold darker and thicker. Plus, the boiling adds bubbles to the ComposiMold.

    What happens if I accidently boiled the ComposiMold?
    In most cases, when people are frustrated at having bubbles on their mold surface it is because they boiled the ComposiMold and then tried to make a mold with the boiling ComposiMold. Instead, give the reusable molding material time to cool. If you accidently boiled the ComposiMold, let the ComposiMold cool slowly. As the ComposiMold cools, the bubbles will rise up and out of the melted rubber. If necessary, you can remove even more bubbles by letting the ComposiMold stay melted at a comfortable 130 to 150 F for a little bit. The bubbles will come out and soon you’ll have a very bubble free molding material. 

    Monday, November 5, 2018

    Tips for Different Casting Materials

    So many casting material choices! Here we talk about what and how you can cast in ComposiMold and ImPRESSive Putty Molds.

    EPOXIES: Epoxy Resins, Epoxy Putty, or Epoxy Clay
    The best tip is to use ComposiMold Epoxy Resin (of course :) ).  ComposiCast resins are very forgiving because you can be off by 10% or more and still get great plastic castings. We are finding that some of the very cheap epoxies are leaving a whitish surface, I believe because of the diluent added to reduce the cost. This is also why those resins don’t harden well sometimes if there is more humidity. This isn’t an issue if you are adding colorants. Use ComposiCast White or Black, or use ComposiCast Clear with different colorants when using the epoxy in ImPRESSive Putty. For larger castings of 8+ cubic inches, choose epoxies with longer cure times of 24+ hours. Experiment with freezing the mold prior to pouring epoxy resins that create a lot of heat during curing. Epoxy resins that require an added heat source for curing are not recommended.
    Astroboy Action Figure Casting: https://www.youtube.com/watch?v=T1bUl8dE8TU&

    URETHANE OR POLYURETHANE:
    For fast cure urethanes, use ImPRESSive Putty because it can handle higher temperatures. Choose a urethane with a longer cure time. These create less heat as they cure. You can also experiment with freezing the mold prior to pouring higher temperature urethane resins, adding fillers, or pouring in intervals. Be sure to use talc powder/baby powder as your mold release before each casting made. Urethanes dislike moisture so the talcum powder makes a nice moisture barrier.

    PLASTER/CONCRETE:
    ComposiMold’s Plaster of Paris or add the Plaster Additive to give harder, stronger plasters in ComposiMold molds. Mix plaster and water together in a 72 parts plaster to 28 parts water, by weight, or to a toothpaste-like consistency.  The thicker the better for stronger molds. Use ComposiMold Plaster Additive in traditional plasters for strong, hard plaster. Fast curing masonry cements work great and cure extremely strong.  Follow instructions for mixing ratios. And we also have the ComposiStone for hard plasters.
    Plaster Casting of Duck Decoy: https://www.youtube.com/watch?v=s_x2TM943yY&

    SILICONE:
    Silicones work great in ComposiMold mold or ImPRESSive Putty molds. Make castings with both platinum and tin cured silicone rubbers.
    Soft Bait Fishing Lure Rubber: https://www.youtube.com/watch?v=JqmX8riVyJk&
    SOAPS:
    Chill the mold prior to pouring any higher temperature soaps (above 140ºF). Shea Butter and Glycerine Soap make great soaps!  For higher temperatures, use ImPRESSive Putty.

    WAXES: (for candle molds or encaustic casting)
    Soy, Paraffin, Beeswax, and Melted Crayons work really well. Chill the mold first for higher temperature waxes (above 140ºF). For higher temperatures, use ImPRESSive Putty, it works awesome (oh wait I said that above too).
    Candles:

    CLAYS, Polymer Clays, Metal Clays, Real Clay, Modelling Compounds, etc.
    Use any type of polymer clay, modeling clay, putty, or real clay for push molding in a ComposiMold. Do not use clay in a slurry form or the water will degrade the mold.

    HEAT FORMABLE PLASTIC
    The plastic that is heated in hot water can be molded and formed using ImPRESSive Putty just like a push mold. Push it in, let it cool.
    Push Mold of Heat Formable Plastic: https://www.youtube.com/watch?v=Sd_77tffByI

    CHOCOLATE:
    Pour or pipe many types of melted chocolate into your mold. Lightly tap or vibrate the mold to release air bubbles in the chocolate. No mold release is necessary for chocolates.

    BUTTER
    Butter fills funny as it doesn’t press back on you. Use soft butter and press it into your mold. Place it in the refrigerator to chill and harden.

    FONDANT:
    Press softened fondant into your mold with your hands or a rolling pin and remove immediately. No mold release is necessary for fondant.

    ISOMALT or Sugar Candies
    The Food Safe ImPRESSive Putty can withstand the heat for smaller candies. Several stores in Colorado have enjoyed making special candies this way. Larger molds, above about 3 cubic inches may have heat damage. Pour water in the mold and then wipe clean before making your mold to remove the activator from the surface of the mold.

    Papier Mache:
    Work by building up in layers and letting the layers dry before moving on. You can make some beautiful castings with just paper and glue.

    ICE
    Freeze your mold before pouring in cold water. Put back in the freezer to freeze the water. Chillingly good results J

    Cookie Dough
    Use a no-rise cookie recipe, so leave out the Baking Soda. Press the cookie dough into the mold, pull it out, and cook it.

    GUMMIES
    Make your own Gummi recipe, or Jell-O with ¼ of the water as they suggest. Use vegetable oil as a mold release. Make sure to get everywhere with the release or it will stick. Let the Gummi liquid cool to room temperature before pouring into your mold.
    Venus Di Milo Gummi (Doh!) https://youtu.be/GaQ9DXi3L_U

    METAL
    You can use low melt metals, like our Wood’s Metal, in the ImPRESSive Putty. You can also use ComposiMold and ImPRESSive Putty for the lost wax process: Make a wax casting of your object, make a plaster mold of that wax object, burn it out, and then pour in your molten metal (easy! Right? Okay, this is pretty advanced).


    You can also try adding fillers and dyes to casting materials, using ComposiMold as a rubber casting material, Modeling Compounds, Polyester Resin, Paper Mache and many more! You may also like our Re-usable Molding Putty, ImPRESSive Putty.

    Friday, October 26, 2018

    How to Make Custom Rocks for Art Dots or Mandala Art Paintings

    Nadine and Stan walk through Art Dots or Mandala painting of rocks and other shapes. The mold making process includes finding rocks and other shapes, pouring ComposiMold over them and pouring in your casting material. Here's the full process in this video.https://youtu.be/FDvLTY-dGC0


    Thank you Nadine from https://www.facebook.com/nadinesdots/


    Please share this video and tell everyone you know about ComposiMold! Plus subscribe to see the next amazing blog post from ComposiMold!


    Tuesday, October 16, 2018

    What size mold can I make with ImPRESSive Reusable Molding Putty?

    ​ImPRESSive Reusable Molding Putty (www.impressiveputty.com) allows you to make molds of many objects just by pressing the object into the putty or pressing the putty over the object. One of the questions we’ve been asked is what can you mold with each size of the ImPRESSive Putties. . This sounds like such a simple question to answer, but the math is a little tiresome, so I’m going to show you examples as we discuss the math.
    First the math:
    The ImPRESSive Putty has a density of about 1.6 grams/cubic centimeter or 0.9 oz./cubic inch. And in most cases you want to keep at least a quarter of an inch thickness as a good rule of thumb. Larger molds may require thicker walls to provide more stability.
    • 1.5 oz. covers about 6.5 square inches of surface.
    • 6 oz. covers about 26 square inches of surface
    • 1 pound covers about 65 square inches.
    Now the example with a video using the Food Contact Safe ImPRESSive Putty.

    We have 4 different sizes of ImPRESSive Putty, a 1 pound size 450 grams, a 6 oz size or 170 grams, and a 1.5 oz trial size, 73 grams. We also have a 5 pounder or 2.2 kg size for even larger molds or more molds. It comes in a box. The 5 pounds of mold making putty is well suited for larger in-situ mold making opportunities such as a statue or part from a building.
    So for the 1.5 oz size you can cover 6.5 square inches of a part. If your part was a simple cube, like a building block, you could cover 5 of the 6 sides. As our first example, here’s a simple building block made into chocolate. Of course, most shapes are not exact cubes so you’ll probably be doing more fancy shapes, which means calculating the surface area becomes a bit more difficult.
    Think of the 1.5 oz size as a trial size for keys, buttons, coins, etc. You can actually do quite a few tiny molds for buttons with the 1.5 oz size. We also made a Mickey Mouse hand with the same ImPRESSive Putty. To melt with placed the putty into the microwave for 14 seconds. Let it cool before handling as it will be a bit hot to touch and manipulate.
    The 6 oz. ImPRESSive Putty is 4 times as much as the 1.5 oz. so you can cover 26 square inches (168 square centimeters) or a cube with 2 inch sides. This turns out to be pretty close to the dimensions of a this cute little salt shaker, which is about 2 x 2 x 3 inches in dimensions.
    Here we are cutting down the side of the mold to make it easier to pull out the shape and then we pour in melted white chocolate. To melt the 6 oz. size place it in the microwave for about 45 seconds for most microwaves. Less time if you’re at higher altitudes such as Leadville Colorado. Let the Putty cool a little before handling because it will be hot.
    Little People figurine. Here we make a two part mold. Mold 1/2, chill this in the freezer, then press the other half. We then pushed in fondant.
    For the 1 pound size This toy train engine is 6 x 3 x 2 ½ inches in dimensions. Because it’s not a complete box shape, I am pushing the limits of what you can do with the 1 pound size, but we squeezed it out by making the mold a little thin in some spots. I actually had to re-melt a spot or two to fill in a hole that had formed on the outside. I also cut down the side to make it easier to get the chocolate out.  

    Friday, August 10, 2018

    How to Make Lost Wax Metal Castings at Home DIY

    DIY LOST WAX METAL CASTING MOLD MAKING

    So you want to make a metal casting? We’ll show you how you can make shapes you make yourself into metals such as tin, aluminum, lead, silver, gold, and other metals.

    Before we begin your die casting, most importantly be careful and use good judgment, 
    Melted metals are very hot and can severely burn you.

    The equipment that you will need includes:
    • Your original shape, We are using a 3D printed eagle, but you can make your original or master object from other materials including, plastic, wood, clay, or polymer clay. You can learn more about what you can and can’t mold with ComposiMold or ImPRESSive Putty by getting your free ebook on the ComposiMold website.
    • You will need your mold making materials, ComposiMold or ImPRESSive Putty. We will first show you the ComposiMold, but at the end of this video we will also show you the ImPRESSive Putty. Both are reusable. The ComposiMold is a heat and pour and will pick up great details simply by pouring.  For the ComposiMold, use either the ComposiMold-Original or the ComposiMold-Flex so you can bend the rubber mold around the wax without causing damage. Also, for the ComposiMold, you will need to chill your mold prior to pouring in the wax. You cannot use the ComposiMold for microcrystalline waxes because of the higher temperatures. Use ImPRESSive Putty instead.
    • The ImPRESSive Putty is a heat and press material that is extremely easy to make molds with, but is firmer, so you may need to make cuts in the mold to remove the wax without breaking it. However, if you use ComposiMold instead of the wax, you will not have any issues. We’ll show you that in another video, but trust us, it’s pretty cool. The ImPRESSive Putty can handle higher temperatures so you do not need to chill the mold first.
    • Other materials you will need to make your metal casting using the lost wax process is a wax. I like beeswax, but you can use microcrystalline waxes with the ImPRESSive Putty. You can experiment with other waxes as well.
    • A metal. We’re using tin. Higher temperature metals such as steel are likely out of the temperature range you can do in a DIY environment.
    • ComposiMold Plaster. ComposiMold plaster contains an additive to make good strong molds in and around ComposiMold.
    • Torch. If you have a high temperature oven that will work too.
    • Something to hold the melted metal in. I use a small crucible.
    • Pliers to hold the hot metal
    • Eye protection, hand protection, and body protection. Please be careful. This is dangerous if not done with care.
    • And some random containers and stir stick
    • Plus an oven, and a fire extinguisher for safety is also a good idea.
    • Do this in a well ventilated area. If in doubt, do not do it.

    Let’s make a metal casting!

    So the general steps for metal casting using a lost wax molding process is here.

    Make a ComposiMold mold of your object so you can make a wax casting so you can make a disposable plaster mold that can handle the heat of the metal.

    It’s much easier than that sounded, so lets start. Melt the ComposiMold in the microwave for about 40 seconds for a small amount. Make your rubber mold by pouring ComposiMold around your object. To stop this eagle from floating I could hot glue it down, but instead  I poured a little ComposiMold into the cup and let it solidify. Then I poured the rest of the ComposiMold over and around the object. The already cool ComposiMold holds the eagle in place. To cool this faster, I placed the mold in the freezer.
    After solidified, in about 20 minutes, I pulled off the mold box container and pulled out the original. Many people like using Legos to make the mold boxes. In this case a cup worked fine.
    The ComposiMold mold is ready to for the wax. I want the mold to be cold when I pour, so while the mold is still cold being in the freezer, I melted the beeswax and poured it into the mold. Let the beeswax cool so it is on the edge of solidifying again to reduce any possible melting to the ComposiMold. The wax will cool from the outside in, so it will chill in the correct shape.

    You can also use ComposiMold to pour into the ComposiMold mold. I will show you that process in a different video. Subscribe to our channel to be there when that video is ready.

    After this cooled in about 15 minutes, I removed the wax eagle from the ComposiMold.
    If I was making beeswax candles, this would be the finished product. And it is very nice.

    Now we make the disposable ComposiMold plaster mold using the wax Mix the ComposiMold plaster with water at about 2.5 parts by weight or volume plaster to 1 part water. I typically just eyeball it and make it as thick as possible while still being pourable.. Place the wax eagle into another mold box, or cup.

    Pour the plaster around the wax figure and let solidify for at least an hour. Two hours or even overnight is better.

    Cut away the mold box to Remove the plaster mold from the cup and Now comes the lost wax process.
    The eagle wasn’t quite on the bottom of the mold box so I chipped away a little of the plaster so I had a hole to pour out the wax and pour in the metal.

    Flip the mold upside down and melt out the wax. I use a few stones to keep the mold up in the air so the wax can come out. You can reuse the wax as well. I melted out the wax at 350 F in an oven for about 20 minutes. Don’t let the wax overheat, it can catch on fire.

    After the wax is removed, continue to warm the plaster to remove more water. You also want the mold warm when you pour in the metal so there is less temperature difference between the plaster mold and the metal.

    Now the last casting step, melt the metal. The tin can be melted with a butane torch. You may need an insulated oven to melt higher temperature materials such as aluminum.

    Clean off the top of the tin. I used a handle of a spoon to scrape off the top layer.

    Carefully pour the metal into the plaster. Definitely wear eye protection and you should also where heat protection for your body and hands. The metal can splatter and cause serious burns.

    Let the metal cool in the mold. You may want to quench the metal to create a different microstructure in the metal, but I did not for this. I let it cool for 1 hour.

    Using a chisel or screwdriver and hammer break away the plaster and admire your metal casting.

    In this example we made the original mold with ComposiMold, but you can also use the ImPRESSive Putty. Here we show you a quick demonstration of how you use ImPRESSive Putty, a higher temperature capable materials to make the wax casting. After you have the wax casting, the process for making the ComposiMold plaster mold is the same.

    Let me know what questions you have. I’d love to see what you make. Please subscribe for more  DIY mold making tutorials. Be careful with the metal, and enjoy.
      

    THE DIY METAL CASTING PROCESS 

    1.       Mold your master object with either ComposiMold or ImPRESSive Putty.
    2.       Make a wax or ComposiMold casting of the object using the mold you made
    3.       Make a ComposiMold Plaster Casting of the wax or ComposiMold casting
    4.       Melt out the wax or ComposiMold
    5.       Melt and Pour in the melted metal into the ComposiMold Plaster Casting
    6.       Break apart the plaster and admire your metal casting
    You can repeat this process using the reusable molding materials. So now we’ll show you the process.


    Sunday, July 1, 2018

    Experiment. It's not just a flavor of Gum

    The following speach was giving at the Maine Association of Manufacturers when ComposiMold was nominated as the Innovator of the Year. 

    Experiment. It’s not just a bubble gum flavor. Business is about experimenting. Nothing? Get it? Spearmint flavored bubble gum…experiment? That failed.  You rarely know what’s going to be successful until you try it. Experimenting is key. Try this, try that, double down on what works, move past what doesn’t. Every chance you get, you need to experiment with ideas with strategies and ideas.

    So where do you start? You start with an idea. And here’s a secret for coming up with ideas. Just keep asking “wouldn’t it be great if…”and answer that. In 30 minutes you can come up with 100’s of ideas.  In a month you’ll come up with 100’s of good ideas. I have a notebook, now a computer document, filled with ideas ranging from launching a rocket off the side of a mountain to reduce the fuel needed get moving to an automobile that could be customized using different outer shells and body components. But of course, those ideas aren’t reality. I don’t even know if they’re any good. It’s only through learning and experimenting that we can see what ideas are good, bad, or somewhere in between.

    ComposiMold was my experiment because I needed a tool to help me make my ideas into real parts and pieces. I started with one product in the ComposiMold business: a reusable heat and pour mold making material. And it was a one page business plan experiment summarized in a statement “I like it, let’s see if others will like it too.” I started with a little cooker in my basement. After the first successes, I doubled my production by going to 2 cookers. After the 3rd cooker, it was time to get out of the house and scale-up to real production levels. And thus the trek continued. It’s been 10 years now and I’m still learning and we’re still experimenting.

    And with ComposiMold you can make awesome stuff into real materials. You can make ideas, change ideas, re-make shapes, parts, pieces, and more. And see what happens. You can make awesome. I know because I get to see what our customers make every week.

    Robot parts, chocolate birthday shapes, Action Figures, jewelry, reusable molds for vacuum forming inserts.  Whole businesses based around a mold making and casting material where you don’t have to keep on buying the mold making material. In the molding industry, this is a paradigm shift. Custom mold making where you can customize your molds, or as an admirer once said once “This is a 3D printer for the rest of us.” And you’re not limited in material options.

    And it is through experimenting, you can make awesome. ComposiMold is your tool for mold making and casting. You can compare it to a hammer or saw for carpentry. Or a paint brush for painting. When you want to duplicate something, ComposiMold products are there.

    But to be awesome takes experimenting. It takes learning. It takes skill. You don’t learn calculus before you know algebra. You can’t paint the Mona Lisa before you learn to draw. Start simple and grow. And when it comes to tools for mold making, you can’t beat the convenience and ease of ComposiMold’s mold making materials.
      
     The ComposiMold experiment started with ComposiMold. This product came out of me making a lot of mistakes. Seems to be the Story of my life. The basics is this: I like crashing model airplanes for a hobby. And when you crash a lot you have to build a lot. And at the time I was building a model airplane that required a whole bunch of spars for the wings. And I didn’t want to make them all by hand. So mold making was a great idea, but in reality it was hard to do, the options were smelly, toxic, and hard to use.  There was no tools, just materials that you bought. At first my shapes floated, I had bubbles in the molds, I had holes in the molds. So there’s that idea question from the beginning “wouldn’t it be great if…” I could learn how to make molds without wasting all this money. That used a non-toxic molding material so I could use it in my kitchen without worry, and wouldn’t it be great if I was able to make dozens of molds with the same mold making material…ya, that would be great.

    And since you can’t get a hit unless you swing the bat, I put the product out there to see what happens. First selling on Ebay, then a website, then resellers. The first reseller was the University of Montana. I also had great advice from the people at Artist & Craftsman. I had no idea what to do! But we got it done! And then we added distributors and international sales. We now have over 100 different products based around our two main mold making materials: ComposiMold, a heat and pour molding material and ImPRESSive Putty and heat and press, press…get it. Yes, the name is obnoxious, but the product really is an impressive tool. These molding materials are your tools for mold making and casting anything from plastics, composites, to chocolate, clay, soap, candles, and so much more. You can do it with ComposiMold. And you can start simple and go to as complex as you want. All with the same mold making materials.

    We are now available in over 600 stores and online, through Europe, North America, and Australia and every week we are continuing to look at new products and business experiments

    We have casting materials including ComposiCast Resins, colorants, and ComposiStone, We have multiple instructional books, ebooks, over 200 video tutorials, and we keep on experimenting. Our newest product experiment is an eco friendly biodegradable soft bait lure making kit that lets anglers make the soft bait lures like they make their own flies. We put out a simple version of this kit last year just to see what happens, and it’s been very popular. So we’re making a better version of this kit for this year.

    I can’t wait to see what happens next on this amazing, no sorry, ImPRESSive Bubble Gum Flavored Experiment. Thank you.


    Wednesday, June 27, 2018

    Questions about Using Polymer Clay with ImPRESSive Putty

    We had some great questions about using the Reusable Molding Putty, ImPRESSive Putty for polymer clay molds. I'd like to share those questions and answers with you:

     If I melt the molds, will I need a teflon bag or can I just do it in a glass dish? 
                Glass dish is fine. Just put the Putty on a plate or plastic bag. If you melt it in a toaster oven, maybe not plastic, but anything just to hold the putty. Be careful it will be hot, let it cool before forming. In a microwave a small mold will soften in about 20-30 seconds. You can also heat it in the toaster oven. It will be quick. Keep the temperature at 200-220 F. Don’t go above 220 F on the toaster.

    Will I need activator to reuse the ImPRESSive Putty? 

    No activator needed. The dampness on the molds is the activator, just wipe it away with a paper towel when the mold is solid.

    Do I need some type of mold release to mold polymer, or polymer with metal leaf on it? - Will mica powder damage the putty if I use that as a mold release?

    You will likely not need a mold release. The activator that is already in the Putty will work as an activator in most cases. If you want to use the mica powder, that’s no problem.  When you re-melt the Putty, just dust off as much as you can and kneed it into the Putty when it’s soft.

    What temperature can the putty withstand in a regular oven, and can it be used for molding liquid clay (liquid clays bake from 265-300 degrees)?

    The Putty melts  at about 185 F, so you probably can’t use the liquid clay directly. You can chill the mold in the freezer to enable temperatures up to about 220 F, but that still seems a little high.

    Let me know what other questions you have. It’s super easy, heat, press, cast, and re-use J You can remelt and reuse that mold you have dozens (and dozens) of times so feel free to experiment. That's why ImPRESSive Putty exists.

    Thank you!


    Wednesday, June 20, 2018

    What's the Difference Between ComposiMold and ImPRESSive Putty?

    Why Would You Use ImPRESSive Putty or ComposiMold?

    Use both:) 

    Both the ComposiMold and ImPRESSive Putty molding material are re-usable and Food Safe. The ComposiMold-Original mold making material is a heat an pour molding material. The ComposiMold is a liquid when warm, whereas the ImPRESSive Putty you heat and press over an object. The Putty will be like a clay when heated.

    • Advantages of the ComposiMold Reusable Molding Materials:
    • 1.       Slightly better details
    • 2.       More flexible and pourable to cover your objects
    • 3.       Transparent so you can see your object that you are molding
    • 4.       Works better with the ComposiCast Clear Epoxy Resin


    Advantages of the ImPRESSive Reusable Molding Putty:
    • 1.       No mold box needed
    • 2.       Firm molds for push molds like polymer clay, clay, or epoxy putty
    • 3.       Higher melting temperature (185 F) vs. ComposiMold (135 F)
    • 4.       Super easy and fast mold making if you chill your mold to cool it


    In many cases, using both together is advantagous. For example, we made a two part mold using both the ImPRESSive Putty and ComposiMold.


    Tuesday, June 12, 2018

    Innovation Award Nomination for ComposiMold

    ComposiMold was selected as one of 3 Maine companies for the Maine Manufacturers Association Innovations Award for its paradigm shifting Re-usable Mold Making Materials. On June 6, 2018, Stan Farrell of ComposiMold presented at the annual meeting.

    Prior to this, ComposiMold was interviewed by Derek Volk of the Derek Volk Radio Show. The broadcast can be listened to at 

    The Derek Volk Show ComposiMold Innovation Award

    The speech giving by Stan was not recorded, but the text is below:

    Experiment. It’s not just a bubble gum flavor. Business is about experimenting. Nothing? Get it? Spearmint flavored bubble gum…experiment? That failed.  You rarely know what’s going to be successful until you try it. Experimenting is key. Try this, try that, double down on what works, move past what doesn’t. Every chance you get, you need to experiment with ideas with strategies and ideas.

    So where do you start? You start with an idea. And here’s a secret for coming up with ideas. Just keep asking “wouldn’t it be great if…”and answer that. In 30 minutes you can come up with 100’s of ideas.  In a month you’ll come up with 100’s of good ideas. I have a notebook, now a computer document, filled with ideas ranging from launching a rocket off the side of a mountain to reduce the fuel needed get moving to an automobile that could be customized using different outer shells and body components. But of course, those ideas aren’t reality. I don’t even know if they’re any good. It’s only through learning and experimenting that we can see what ideas are good, bad, or somewhere in between.

    ComposiMold was my experiment because I needed a tool to help me make my ideas into real parts and pieces. I started with one product in the ComposiMold business: a reusable heat and pour mold making material. And it was a one page business plan experiment summarized in a statement “I like it, let’s see if others will like it too.” I started with a little cooker in my basement. After the first successes, I doubled my production by going to 2 cookers. After the 3rd cooker, it was time to get out of the house and scale-up to real production levels. And thus the trek continued. It’s been 10 years now and I’m still learning and we’re still experimenting.

    2.  And with ComposiMold you can make awesome stuff into real materials. You can make ideas, change ideas, re-make shapes, parts, pieces, and more. And see what happens. You can make awesome. I know because I get to see what our customers make every week.

    Robot parts, chocolate birthday shapes, Action Figures, jewelry, reusable molds for vacuum forming inserts.  Whole businesses based around a mold making and casting material where you don’t have to keep on buying the mold making material. In the molding industry, this is a paradigm shift. Custom mold making where you can customize your molds, or as an admirer once said once “This is a 3D printer for the rest of us.” And you’re not limited in material options.

    And it is through experimenting, you can make awesome. ComposiMold is your tool for mold making and casting. You can compare it to a hammer or saw for carpentry. Or a paint brush for painting. When you want to duplicate something, ComposiMold products are there.

    3. But to be awesome takes experimenting. It takes learning. It takes skill. You don’t learn calculus before you know algebra. You can’t paint the Mona Lisa before you learn to draw. Start simple and grow. And when it comes to tools for mold making, you can’t beat the convenience and ease of ComposiMold’s mold making materials.
      
    4. The ComposiMold experiment started with ComposiMold. This product came out of me making a lot of mistakes. Seems to be the Story of my life. The basics is this: I like crashing model airplanes for a hobby. And when you crash a lot you have to build a lot. And at the time I was building a model airplane that required a whole bunch of spars for the wings. And I didn’t want to make them all by hand. So mold making was a great idea, but in reality it was hard to do, the options were smelly, toxic, and hard to use.  There was no tools, just materials that you bought. At first my shapes floated, I had bubbles in the molds, I had holes in the molds. So there’s that idea question from the beginning “wouldn’t it be great if…” I could learn how to make molds without wasting all this money. That used a non-toxic molding material so I could use it in my kitchen without worry, and wouldn’t it be great if I was able to make dozens of molds with the same mold making material…ya, that would be great.
    And since you can’t get a hit unless you swing the bat, I put the product out there to see what happens. First selling on Ebay, then a website, then resellers. The first reseller was the University of Montana. I also had great advice from the people at Artist & Craftsman. I had no idea what to do! But we got it done! And then we added distributors and international sales. We now have over 100 different products based around our two main mold making materials: ComposiMold, a heat and pour molding material and ImPRESSive Putty and heat and press, press…get it. Yes, the name is obnoxious, but the product really is an impressive tool. These molding materials are your tools for mold making and casting anything from plastics, composites, to chocolate, clay, soap, candles, and so much more. You can do it with ComposiMold. And you can start simple and go to as complex as you want. All with the same mold making materials.

    We are now available in over 600 stores and online, through Europe, North America, and Australia and every week we are continuing to look at new products and business experiments.

    We have casting materials including ComposiCast Resins, colorants, and ComposiStone, We have multiple instructional books, ebooks, over 200 video tutorials, and we keep on experimenting. Our newest product experiment is an eco friendly biodegradable soft bait lure making kit that lets anglers make the soft bait lures like they make their own flies. We put out a simple version of this kit last year just to see what happens, and it’s been very popular. So we’re making a better version of this kit for this year.

    5. I can’t wait to see what happens next on this amazing, no sorry, ImPRESSive Bubble Gum Flavored Experiment. Thank you.

    Tuesday, June 5, 2018

    Arts and Craft Mold Making

    Arts and crafts mold making projects

    So much you can do! Let's your imagination go wild! Here's some examples ranging from the simple molds to the more complex. 

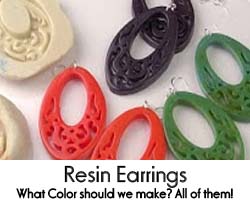
    colorful-resin-earring-jewelry-with-composicast-and-impressive-putty.jpg


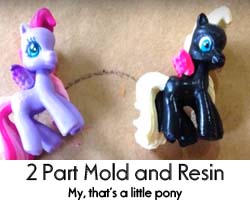
    2-part-mold-of-pony-with-impressive-putty-and-resin.jpg
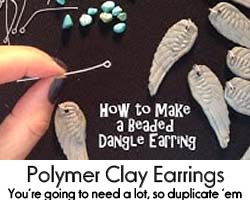
    polymer-clay-molds-for-dangle-earrings-using-composimold.jpg