Showing posts with label mold making. Show all posts

Tuesday, June 5, 2018

Arts and Craft Mold Making

Arts and crafts mold making projects

So much you can do! Let's your imagination go wild! Here's some examples ranging from the simple molds to the more complex. 

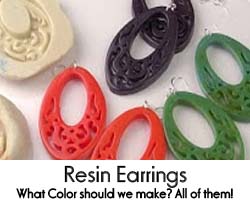
colorful-resin-earring-jewelry-with-composicast-and-impressive-putty.jpg


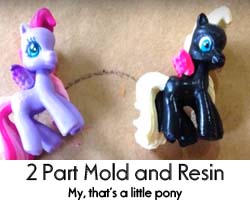
2-part-mold-of-pony-with-impressive-putty-and-resin.jpg
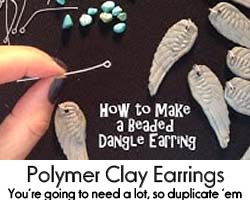
polymer-clay-molds-for-dangle-earrings-using-composimold.jpg
  

Monday, May 7, 2018

Background on ComposiMold Reusable Molding Materials


The following interview occurred on May 7, 2018 with Stan Farrell, President of ComposiMold. 

Introduction to ComposiMold Reusable Molding Materials. 

We make a full range of products for mold making and casting based on re-usable molding materials that allow people to experiment and learn the mold making process without worry or spending lots of money. The ComposiMold molding materials can be used for duplicating pretty much any object into different materials like resins, concrete, soap, candles, and edible treats like chocolate

What is ComposiMold and how did you get started?

ComposiMold reusable molding materials is all about experimentation. The whole business started with experimentation.  From a single page experimental business plan to the product, and now product line. I wanted a material that allowed me to make plastic (and now lots of other casting material) parts. And I made ComposiMold to allow me to do that. And on a business side, I wanted to experiment with the process of making, or manufacturing a product.  So ComposiMold became this great product for me because I could experiment without wasting money on mold making materials to make plastic parts, and I could learn how to take a developed product from laboratory experiments all the way to sales and then sales growth.

When did you start selling ComposiMold?

2009 was the first time we sold ComposiMold on eBay.  Without any particular advertising except for a website and a few tutorials, it gained a little traction, and then after a cute kid Super Awesome Sylvia and her Dad did a video that went to over 100k views. Turns out lots of people wanted an easy to use re-usable molding material. ComposiMold, the company, was born.

What products do you have?

We have the “full Monty” for mold making and casting all based on the idea of Re-usable Molding Materials. We have the molding materials: ComposiMold and ImPRESSive Putty. Plus we have the castings materials: ComposiCast Resin, ComposiMold Plaster, and ComposiStone. And we also have the accessories: colorants, Bubble Buster, Mold Release, and fillers. All available on our website or through our resellers. www.composimoldstore.com

Our newest mold making is our food contact safe re-usable molding putty. This was developed with the help of some fantastic supporters of our Kickstarter campaign.

And our colorants are wildly popular. Black is over the top. I don’t know why black is so much more popular yet.

Anything else you want to say?

The key that I want to emphasize is the need to experiment. ComposiMold exists because of experimentation and people grow by experimenting and exploring. As a product, ComposiMold helps do this, and hopefully, we can continue to find ways to support the experimenters who want to make real things.

How do we find ComposiMold?

1-888-281-2674 calls, email info@composimold.com or visit us online at www.composimold.com  


Stan’s Bio

Stan Farrell, president of ComposiMold, continues to experiment. Educated in material science and researching composites and polymers for the past 20 years, Stan has continuously tried to make products, ideas, and business better. 

Stan started ComposiMold because he was frustrated at his inability to make lightweight plastic forms for his model rocket and airplane parts. ComposiMold mold making materials are eco-friendly, safe, and very easy to use for mold making and casting. Since the first ComposiMold was sold 9 years ago, ComposiMold continues to create a full mold making and casting system for mold makers including improved molding materials, casting materials, and dozens of accessories. Stan will continue to experiment with new products and new materials to make it easier than ever to make what you want.

Other research endeavors that Stan has worked on include improved ballistic protection materials, steerable parachutes, thermal protection systems for reentry vehicles, and many more.


Stan also enjoys the Maine environment as much as possible including kayaking, skiing, sailing, hiking, biking, and anything else that gets him outside.  If you don’t see him on the trails or waters, you may find him enjoying local music at a nice brewery or cafĂ© with his family.

Monday, April 2, 2018

Viva La Cake Uses ComposiMold for a Very Important Part of Her Carousel Cake


Our friend Joly Diaz of Viva La Cake (www.vivalasugarcake.blogspot.com) had a problem! The pre-made mold she bought for her carousel cake was not going to work! 

"I got a mold specifically for this cake, but the horses faced the opposite direction to the turn table movement. I had to use a toy horse and use your product to get it done right. It was awesome and sooo helpful."

We were so happy to hear that having ComposiMold in her cake decorating tool box, empowered her to make her cake as she envisioned it...horses galloping forward, not backwards.

Then she did a little experimenting with making her own master object to mold:

"Then I made a horse in fondant, let it dry, poured your product over it and it also worked!"

With this technique, you can truly make one-of-a-kind cakes!

Thank you Viva La Cake for sharing your awesome project. We were very impressed with this work of art. 

-The ComposiMold Team


Please share this video and tell everyone you know about ComposiMold! Plus subscribe to see the next amazing blog post from ComposiMold!


Sunday, February 25, 2018

The 5 Levels of Mold Making Expertise

Mold making and casting is a craft and skill that requires practice to become better. Like learning to play music or sewing, there are certain skills that are easier than others. Here we look at the different skills and try to separate them into levels of proficiency.

Level 1: Simple Relief Sculpture Mold Making

A basic shape with no undercuts. Short sides so you can push in a casting material or it’s a simple pour.
Examples: one side of a button, a cookie shape, a pendant, or a stamp. This also includes large molds like concrete stamp pads or stepping stones.

Skills : Melting/using Reusable Molding Materials. Creating mold box (if used, ImPRESSive Putty doesn’t need a mold box). Understanding molding process. Creative design and use of casting materials. Almost anyone can do these types of molds and it’s a great way to explore mold making in classrooms.
Lots of our fast video examples are level 1 molds:

Examples include:
Custom soap molds: https://www.youtube.com/watch?v=krKXXJU1EwU
Polymer Clay push mold decals: https://www.youtube.com/watch?v=EgYkmw4VFwo
Polymer clay leaf: https://www.youtube.com/watch?v=KkbhtzgcbGw
Lace in fondant: https://www.youtube.com/watch?v=x2TTTRFbz6g
Button molds with ImPRESSive Putty: https://www.youtube.com/watch?v=7ARvikSofI0
Soft bait fishing lures: https://www.youtube.com/watch?v=6mty4PVtJ1g
Restoring frames: https://www.youtube.com/watch?v=P2D6R0Lw22k


Level 2: Basic Undercuts with a flat bottom Mold making

Relief sculptures with undercuts that can still be removed by pushing out the shapes. Examples include
Chess piece, some figurines, many sculpture pieces.
Skills: Level 1 skills and a little more confidence to push and pull on the molds to get the castings out.
Big chocolate gnome: https://www.youtube.com/watch?v=nEtlj8YtcCo
ImPRESSive Putty Building Renovation project: https://www.youtube.com/watch?v=TVjs3W5Ls4A
Resin Casting of Toy Stone Wall: https://www.youtube.com/watch?v=Urk8DqbJ1Ns

Level 3: Intermediate mold maker

Cut Block Molds and brush on molds would fit in with the intermediate mold maker.
Skills include: figuring out where to cut the mold to create a parting line, planning how you will get your part out of the mold. Here’s some video examples:
Big Plaster Duck is Level 3 because of the duck bill and head, but it’s still pretty simple with the a single pour mold: https://www.youtube.com/watch?v=s_x2TM943yY
Cut blog chocolate figurine: https://www.youtube.com/watch?v=-xGWrGZX4Ic
Resin Casting Action Hero: https://www.youtube.com/watch?v=qKqjLlvqKyo
Chocolate high heel shoe: https://www.youtube.com/watch?v=i3q90i0VW2o
This is a big concrete dog, but the basics are the same: https://www.youtube.com/watch?v=OkR9t7Os6l8

Here’s a brush on mold (now I’d just press on ImPRESSive Putty to do this)
https://www.youtube.com/watch?v=aFR2eJymfDQ

Level 4: Advanced mold maker

Two Part Molds, deep undercuts, multiple parts, thin walls. The skills needed include creating parting lines, and designing sprues.

Combining ImPRESSive Putty and ComposiMold for a Thin Walled boat hull plug:
https://www.youtube.com/watch?v=i2qgP_kN3Os

Two part mold action figure: https://youtu.be/rtxgSLUYwIg

Just the size of the chocolate horse’s head makes it a challenge:
https://www.youtube.com/watch?v=lt1RqjF1MIk

Level 5: Master Molder

Some things, no matter how simple the mold making material is to use is complex. It will take thinking, expertise, and experimenting to make the complex molds. We endlessly are asked how to make a 3 part casting of a giant (or microscopic) dragon with wings and horns with movable arms, head, and legs, plus the rider carrying swords, a backpack, and hallo. Our response typically is to start simple and expand your skills by moving to more complex. Because ComposiMold is re-usable, start with the dragon’s head or the sword and work up to the more complicated. You will make mistakes, and you will need to experiment. And that’s why ComposiMold exists. So you can learn, experiment, and create as you like.

Here’s some examples of some pretty complex parts. Each individual piece of a Lego person that can be used to make an entirely new usable Lego person. Full moving Lego person: https://www.youtube.com/watch?v=eQtudWSxVUQ (3 full length parts going through the entire process)
Making a hollow/movable parts Shopkin’s Toy: https://www.youtube.com/watch?v=5kkJ0BqfjGI

The casting materials you use are somewhat immaterial of your molding level. You can use epoxy resin or plaster or chocolate for simple molds or complex mold making. Exceptions for ComposiMold include using ComposiMold for the lost wax process or high temperature sugars in ImPRESSive Putty.

While in many cases the casting material doesn’t matter, some molds ARE more complex because of the materials being molded or cast. For example, isomalt is challenging to work without practice. See it being used with the Food Safe ImPRESSive Putty here: https://youtu.be/5QJ_ePYpoaA
And higher temperature waxes can be a challenge with ComposiMold (but not an issue with ImPRESSive Putty) https://www.youtube.com/watch?v=n6787iFpAdM

And Bath Bombs are challenging, not because of the mold making but because the bath bomb mixture cannot have a lot of water in it, but it does need some: https://youtu.be/-f2ZwXe0bwg
Jell-O or Gummies can be a challenge initially typically when the gelatin mixture is poured too hot. So by letting it cool, the process becomes very simple. Here’s a gummy Lego example: https://youtu.be/HA6U5u56y1I

When making the mold, you can sometimes run into challenges that are more complex includimg the molding of low melt polymer clays like Plasticine or molding frozen object. This requires the ComposiMold to be poured after it has cooled a bit and keeping the objects cold.

Which level are you?

So what molds have you made? Are you an intermediate mold maker? Advanced?

We’d like to add on these descriptions, so any thoughts and suggestions from you would be helpful. We’ll be updating the information in our blog (http://composimoldstore.com/blog/) as well as our Learn to Mold section of our website. http://composimoldstore.com/learn

Thank you and keep making awesome!

ComposiMold Reusable Molding Materials

Monday, April 3, 2017

Essential Art Supplies for Artists Striving to Enter the Third Dimension

Having the right tools at your disposal can really help you bring out the artistic vision in you, but if your only tools are for the two dimensional world, that’s all you’re going to get is two dimensions. It’s time to leave the flatness of two dimensions with sculpture mold making and creativity. The World is Not Flat.

We offer the tools to push the boundary of 3D art and sculpture without worry or fuss. ComposiMold mold making products are re-usable, eco-friendly, and simple to use. Simplicity and re-usability are important so that you are working on your vision, not worrying about how you are going to make something without wasting material.

As a tool, it is there when you need it…like a paint brush. ComposiMold and ImPRESSive Putty can be re-melted and re-used to make molds and casting whenever your artistic vision desires. The mold making materials will last for years if kept in a seal bag or container.

Here’s Helene Farrar using ImPRESSive Putty in her encaustic painting to make the painting jump out of the canvas. A simple sculpture makes the entire painting stand out. She is using a 3000 year old artistic medium to make something never before created.
Making 3D Encaustic Art: Helene Farrar (helenefarrar.com)
https://youtu.be/CdMtV6ZwU9Q


And visit the PolymerClayTutor to see how she is using ImPRESSive Putty in her artwork.
Brought to you by Cindy and Doug Lietz... "Make what you love... Love what you make!"


The tools are there. It’s time to reach into the third dimension with your art.


Please share this blog if you like it...your support really helps. For More Information Visit: 

Sunday, March 5, 2017

10 Most Commonly Asked Mold Making Questions

Mold making is defined as the process of duplicating other objects through the use of molds. To make molds you can use a variety of techniques and materials. We thought we would answer some of the most frequently asked questions on mold making here as it relates to mold making, ComposiMold, and ImPRESSive Putty.

How much mold making material do I need?

If you know how many gallons or liters of ComposiMold you need: The quick answer is that you will need 11 pounds per gallon, 2.75 pounds per liter or 0.042oz. per ml.

If you don't already know the volume of material you need, you can measure water as if it were ComposiMold as seen in this video: 


Or You can do Math!

Start by figuring out the size of your part. The easiest way to estimate is to take the length, width and height dimensions as an estimate in cubic centimeters or cubic inches. To this dimension, add an inch to each dimension and find the total area of your mold (Or use the volume of your container that you will be molding the part in) Subtract the part size from the container size and multiply by the density of the ComposiMold. This will give you the amount of ComposiMold you need.

ComposiMold has a density of 1.2 grams per cubic centimeter or 0.7 ounces per cubic inch. In most cases approximately a 0.5 inch on the outside of your mold is good to provide mold support to your mold.

10 oz. ComposiMold = 14 cubic inches 
20 oz. ComposiMold = 28 cubic inches
40 oz. ComposiMold = 56 cubic inches

Here is an example:
The part to be molded is 4.5 x 6 x 0.5 inches. I suggest about a 0.5 inch of ComposiMold around to provide support. So 5.5 x 7 x 1.5 inch container. 57.75 cubic inches of material minus the original piece 4.5 x 5 x 0.5=13.5 cubic inches. So 57.75-13.5 = 44.25 cubic inches. Convert to weight. ComposiMold has a density of 1.2 g/cc (0.7 ounces per cubic inch) so: 44 times 0.7 = about 30 ounces of ComposiMold to make this mold. ComposiMold is also nice because if you decide to make the mold bigger or use too much material, you can just reuse it later, so it is not just wasted unlike most mold making materials.

For press molds like ImPRESSive Putty, you need to estimate the surface area. Typically, you want about a 1/4 inch to a half inch of mold making putty around your part. You can get a quick estimate of the surface area by placing a piece of paper around your mold. Measure that area and then multiply it by a thickness. 

And the advantage of ComposiMold and ImPRESSive Putty is you can re-use it, so you aren't wasting any material if you melted too much. 

What can I cast into the molds? Can I mold metal?
You can use many casting materials in the ComposiMold rubber molds including:

plaster or gypsum, concrete:Use as thick a mixture as possible to give stronger castings: Because ComposiMold is biodegradable, if the solution is too liquidy, you may damage the mold details.

Silicone: Use either tin cured silicone or platinum cured silicone rubber. Both work great as rubber casting materials.


plastics:look for urethane or epoxy resins that cure slowly to reduce the heat created during curing.

chocolate:works awesome: white chocolate, dark chocolate, tasty chocolate

candle wax, and soap! Freeze the ComposiMold first so that the wax or soap will cool faster than the ComposiMold can heat up.

Many others.

ImPRESSive Putty works with the same materials plus fast curing urethanes, and low melt metals. ImPRESSive Putty is not certified food contact safe like ComposiMold.


ComposiMold melts at 130 F. Any casting that creates heats up to more than 130 F can melt ComposiMold, but there are many ways to get around this limitation. Examples include:
  • Pouring in intervals so each pour only creates a little heat and the heat can dissipate
  • Adding filler such as dry talc, other dry powders, wood chips, etc. to the casting material so there is less casting material to create heat
  • Freeze or Cool the ComposiMold or ComposiMold-Firm (PowerMold) prior to pouring in the casting material. The heat during curing can sometimes be removed faster than the ComposiMold can heat up. This is a great way of doing candle wax and soaps.
  • Using a brush-on mold making material such as latex, urethane rubber, or silicone to create a barrier. This also helps create molds that can last for many more castings. This allows 90-95% of the mold to be reused whiles still getting the benefit of longer lasting molds.

How do I add colors to my casting materials?
We have special resin colorants that work really well with most resins. In epoxy, you can use a little acrylic paint and even a little food coloring as well. We also have glow in the dark colorants.

Can I make molds of body parts? Can I make body molds?

ComposiMold is a little too hot. ImPRESSive Putty will work, but is slower to cool unless you can put it in a cool environment. We have body molding powder that will work as well to duplicate body parts, but it typically can only be used once. 

Is it safe for food molds like chocolate molds?
ComposiMold is certified food contact safe. So yes, chocolate mold making is awesome. The chocolate is also re-usable, unless you eat it.

How do I make a mold?
Download our free mold making instructions e-book to learn more. We also have tons of videos. Start simple. Remember, ComposiMold is re-usable, so as you get more comfortable, you can build up to more complex molds.

What mold making material do I use?
We actually have 3 different ComposiMolds:
·         ComposiMold-Flex: for waxes, soaps, and chocolates (shore A hardness of about 3-5, soft and very flexible to make it easier to flex the casting out of the mold)
·         ComposiMold-Original: a good compromise of firmness and flexibility so you can still easily remove your parts (shore A hardness of about 10 at room temperature)
·         ComposiMold-Firm: firmest, mostly for polymer clay push molding. (shore A hardness of about 20)


We also have the ImPRESSive Putty, which is pretty firm as well.

HOW MANY TIMES CAN ComposiMold BE RE-MELTED AND RE-USED?
With care, (not burning it and filtering debris from it) there is no limit to the number of times you can reuse ComposiMold or ComposiMold-Firm (PowerMold). They have been certified to conform to ASTM D-4236 for reuse more than 35 times.


We need one more question, so please let us know what questions you have, and we'll answer it. Email us at info@composimold.com, or call 1-888-281-2674


Please share this and tell everyone you know about ComposiMold! Plus subscribe to see the next amazing blog post from ComposiMold!


Tuesday, February 21, 2017

How to Make Unique Soap Molds, Trump Soap on a Rope


Soap Molds that you make yourself.


Experiment!  Today we are going to show you how to make a unique soap mold using a 3D printer and ComposiMold. We downloaded a design of the Bust of President Trump from Thingiverse that was designed by CU 3D and threefer. It took several tries to print before we were ready with our Master shape. To make the surface smoother than what you get with the 3D printer we washed the shape in acetone.

To make the soap mold: we hot glued the Trump Bust to the bottom of a cup and then sprayed it with Bubble Buster.

We melted the ComposiMold-Flex  Re-usable Mold Making Material  in the microwave for about 1 minute using a 40 oz. container to obtain enough melted molding material. This was poured over the master part.

The mold solidified in about 30 minutes in the freezer. The original part was extracted from the mold, and we now have a unique soap mold.

In this project, we are making a Soap on a rope, so a piece of rope is placed into the mold. The soap is melted in the microwave and then poured into the chilled ComposiMold Mold.

Be sure the soap is cool prior to pouring into the mold.

We then extract the soap from the mold by peeling the ComposiMold away from the soap and then pressing the shape out. If necessary, use scissors to cut a parting line.

While 3D printing the bust, we had a print that did not complete, which gave us another idea for
adding a sponge to the top of the bust. So here is another mold and soap we
made of President Trump. The mold making process is the same.

You will notice that the head was facing to opposite way in the mold because we wanted his head to be open when we poured in the soap.

The sponge is cut to fit the shape of his head.

We added a piece of rope to the sponge so it will stay on his head better.

We then poured in the melted soap and placed the sponge on to his head.

This mold was placed in the refrigerator for about 30 minutes before pulling the soap out of the mold.

We carefully pulled the ComposiMold away from the soap, and we had our very own soap of the President of the United States.

Thank you for watching. We have lots of other unique videos, so please subscribe, sign up for our free e-book at ComposiMold.com, and let us know what we can do to help you with you mold making ideas.

Please share this blog and tell everyone you know about ComposiMold! Plus subscribe to see the next amazing blog post from ComposiMold!

Thursday, February 16, 2017

Make Your Own Soft Bait Fishing Lures with Mold Making and Casting

Now you can make your own lures. Mix and match heads, bodies, and tails to create the perfect lure for your angling needs. Then make a mold of your unique lure shape and cast with the included Soft Bait Rubber. The mold Putty is re-usable, so melt your mold and make as many different shaped lures as you want.
To start making your own soft bait lures, you can use the shapes we provide, but when you’re ready you can expand into almost any shape.
Supplies Included:
  •  ImPRESSive Putty (You Press it over your objects to mold…get it? And it’s re-usable for dozens of molds. Impressive, we know.)
  •  2 part fishing lure Soft Bait Rubber (non-PVC based). Enough rubber for up to 20 rubber lures
  •  9 interchangeable fishing lure pieces for over 50 unique lure shapes.
  •  Gloves, stir sticks, mixing cups, and instructions.

MIX AND MATCH HEADS, BODIES, AND TALES FOR 50 COMBINATIONS OF CUSTOM SOFT BAIT FISHING LURES

MAKE THE LURE SHAPE AND MOLD
  1. Create a truly unique lure by choosing one head, body, and tail from the included shapes. You can make your lure longer by using 2 body pieces instead of 1.
  2. Use a dot of hot glue to hold each one together. Scrape away any hot glue along the seam.
  3. Heat the ImPRESSive Putty in the microwave in 15 sec. intervals until dough-like with no lumps.
  4. CAUTION HOT: Let stand for 10 minutes until temperature is comfortable to handle.
  5. Place your glued shape on a flat surface and PRESS the ImPRESSive putty onto the shape.
  6. Let Putty cool at room temperature until firm to the touch or 15 minutes in the freezer.
  7. Remove original shape by flexing the Putty away from it and pulling it out.
CAST THE LURE, then Cast your lure.
  1. Thoroughly mix Part A and Part B of Soft Bait Rubber in equal portions by volume.
  2. If you choose, you can add any dyes, fillers, glitters, scents at this time. IDEA: Add crushed up pieces of Styrofoam to decrease weight of lure or add dry sand to make it more dense. Resin Colorants and Glow In The Dark Powder sold separately.  
  3. Wipe any Activator off the inside of the mold with a paper towel or cloth before pouring your Soft Bait Rubber in.
  4. Pour your Soft Bait Rubber into the mold until it is flush with the top of the mold. Tap mold gently to release any air bubbles.
  5. Let the resin cure in the mold for 5-10 minutes or until rubbery to the touch.
  6. Flex the mold away from the casting to remove your one-of-a-kind soft bait fishing lure.
  7. Try it out…Go fishing.

 
CAST MULTIPLE LURES OR RE-MAKE YOUR LURE SHAPE
You might want to make a couple of the same lure just in case your neighbor decides to help himself to your prize winning lure. So repeat the casting process above to create multiple lures in that configuration.
OR
Break the lure shapes apart by slicing through the cooled hot glue. Scrape the cooled hot glue off of the pieces and rearrange them into a totally different lure configuration. Re-Melt the ImPRESSive Putty mold and repeat the process of creating your mold and castings.
SAFETY: ImPRESSive Putty is hot when melted and can burn. DO NOT handle straight out of the microwave. Let it stand until cool enough to handle comfortably. ImPRESSive Putty is not certified for use with edible materials. Leaking Activator from Putty can stain furniture. Store in an airtight container. Intended for ages 10 and up. Do not eat the Putty.
Soft Bait Rubber:  The soft casting rubber is a two part silicone casting resin with very low hardness (Shore D of 5) formulated to attract really good looking and big fish. While still in liquid form, the Soft Bait Rubber should be kept away from your skin. Use gloves. Do not eat or drink. 
Please do not litter. Please do not leave your rubber lures in the water or fish. The lures are not biodegradable. 


Please share this video and tell everyone you know about ComposiMold! Plus subscribe to see the next amazing blog post from ComposiMold!
For More Information Visit: 

Sunday, January 8, 2017

Plastic Casting and Rubber Casting

Here we describe the plastics and rubbers as basic types of material to use as a casting material:

Plastic casting parts
Plastic parts cast in molds
 Rubber or elastomeric: Rubbers range from super soft to hard, almost like plastic. The hardness are ranked from Shore OO-5, very soft like a rubber fishing lure to Shore A to Shore D of 80 or 90, which is hard like a skateboard wheel.  Rubbers can be silicones, urethanes (also called polyurethanes), latex, PVC based, and others. The two recommended for most castings is urethane rubber or silicone rubber, and there are a lot of different options based upon the other properties you are looking for such as amount of elongation, strength (typically listed as tensile strength), tear strength (how easy it is to rip after a rip has started), color and feel, and how easy it is to make.  Thermoset resins require mixing two parts together and depending on the resin, this ratio will be different. If the instructions for a particular resin do not say specifically, they are typically mixed by weight, although many will give the mixture ratio as both by weight and volume. Each one of those rubbers will be discussed in future blog posts.
Rubber casting of an X, made with silicone rubber 

Plastic: we hear a lot of people ask for plastic that acts like the plastic of an Army soldier.  Army soldiers that you buy are made from thermoplastic resins, but you will likely be casting with thermoset resins. The difference is thermoplastics are melted into a thick goo and squeezed into the molds. Whereas the thermosets are two part resins that are mixed together as a liquid (or paste) and poured into your molds. It’s a lot easier to make your own castings with thermosets because it can be poured. Thermosets, after they are cured, cannot be re-shaped.  Thermosets can have very similar properties as compared to thermoplastics.
Different types of plastics include urethanes, epoxies, polyesters, vinyl esters, and others. For home or small industrial, the main plastic resins are epoxies and urethanes. Polyesters are much cheaper, but the smell and toxicity are extremely detrimental. It is also more complicated to use.


Rubber Casting Material

“Exotherm” of a Casting Material is the heat of reaction produced as a resin or rubber cures. If the casting is thin then heat is easily dissipated in the mold, but thicker pieces will create more heat. To compensate, large pieces can be poured in intervals or add fillers to the casting material.


Please share this and tell everyone you know about ComposiMold! Plus subscribe to see the next amazing blog post from ComposiMold!


Monday, December 26, 2016

5 Mold Making Techniques to Rule to World

How to Use Different Mold Making Methods
The purpose of mold making is to duplicate your creations either in the same material the original is made in or into another material. But first you have to make your mold. The mold making process is very versatile, so you can choose how you do it based upon what your master object is shaped like. Typically, you don’t want to make your mold any more complicated than you need. Here are 5 techniques that can be used:
1.       Pour Block mold method: This is the go-to method. Because ComposiMold is clear. You can always make it into a cut block mold. The technique is a simple: place your master into a mold box and pour ComposiMold over it. It gives you a sense of what the mold will look like, and you can always re-melt it and make it a different way.  If your part is lightweight and will float in water, hot glue it to the bottom of the container.

Pour Block Mold Making Technique
2.       Cut block mold: Almost as easy as the pour block method. Make a pour block method and then cut out your master where you want the parting line to be. Because ComposiMold is a clear rubber that you can cut with scissors or a knife, we just pour it over the part, allow the ComposiMold to cool, and cut the mold in half. Sounds easy, and for the most part it is. You will still have to worry about where to make the parting line and keeping the part together while casting the new piece. There is no reason why more complex molds with three or pieces cannot be made using this same techniques.
 Cut Block Mold Making Method for Chocolate Molds
3.     The Press Mold: With ImPRESSive Putty, just press your Putty over the part you are molding. The nice part about the rubber molding putty is that you don’t need a mold box. However, you will lose a little detail on the corners.
Press Molds Technique

Press Molding Technique
 The Brush-on Mold or Paint on Mold: Paint-on molds are made by painting the molding material directly onto a model’s surface. The advantages of a paint-on mold are that it is possible to use less material and you can mold parts that you could not do with a typical molding process. An example where you may need to use a Paint-on mold is making a mold of something attached to a wall.

5.       2 Part Mold Making Method: In many cases, it is best to prepare the mold in two parts. This may be because there are specific undercuts that you need to mold around, you want to make a parting line that is not straight, or you want a three part mold. The two part mold is well suited for dramatic undercuts that would leave spaces or voids in your mold. Use clay or polymer clay to build up around the figurine. Build up the area to the point where you want the parting line in the mold. This parting line is selected to allow the mold to be separated easily. After the clay is completed, lightly cover the master part and clay with a mold release. Pour ComposiMold over the Master and clay to make the first half of your mold. When the ComposiMold has solidified, pull off the first half of the mold, flip your Master and pour ComposiMold over the part again being sure to have mold release in between the layers, and in larger molds chill your first ComposiMold half before pouring the second. After the second ComposiMold half has solidified, pull it off of the Master. Pull out the Master part from the mold. You are now ready to make your casting.

 
Two Part Molds Mold Making Techniques


For a much more in depth methodology, please download your copy of the “Setting You Up For Mold Making and Casting Success” at http://composimold.com/Ebook.html

Mold Making Techniques