Katherine of Resin Obsession (http://resinobsession.com/) asked us to clone her dinosaur toy. She wanted to see how we do it, and she thought it would be a great way to show the power of ComposiMold to her customers.
So after she delivered the dinosaur to us, I got busy.
You never know the best way to make a mold. Even the best mold makers need to experiment to find out how they should set it up.
Where should you pour in your resin? Do you need to make a two part mold? Where should the parting lines be?
And that’s where ComposiMold comes in to play… it is reusable. I can experiment without worry, and without wasting materials.
So I did what I always do when starting a new mold making project…I experimented.
I placed the dinosaur into a cup and poured ComposiMold over it to see what happened…
I would like to say it worked perfectly and the mold is done and that’s the end of the story, but it’s not…well sort of…It did work just not the way it was supposed to.
The dinosaur didn’t float, but it didn’t stay on its feet. It flipped over onto its side…oops. Good thing I wasn’t using silicone rubber for my mold! First, I wouldn’t have known that it was flipped over because the silicone is opaque, second I would have wasted $30 on a messed up mold.
With ComposiMold, I placed the mold in the refrigerator to cool off, started to pull out the dinosaur to do it again, when I realized that the mold turned out pretty good.
When it was solidified, I thought that the mold looked pretty good, so before remelting it, I poured a little more ComposiMold over the side to make it a little thicker, cut out the dinosaur and filled it with the epoxy just to see what it would be like…it was difficult to fill the small parts…I used a small wire to push the bubbles out of the hands and tail. So the mold worked. This blue dinosaur is actually a color changing dinosaur. When I add heat, it will turn clearer. (She’ll turn invisible!)
But since that wouldn’t make a good video I decided to do it again. Yes, I know. ComposiMold is cool…no wait, warm, warm when it’s melted. So I remelted the mold and did it again the “right” way so I can have it on video….
That great part is that I have not wasted any money or mold making material. I’ve experimented, learned the best way to duplicate the action figure, and can do it again! Experiment #1 is a success.
First I coat the dinosaur with a thin layer of mold release, and then spray it with Bubble Buster to reduce the chances of bubbles sticking to the part.
To hold the dinosaur in place now that I know it will flip over, I have several options. I can glue it in place, do it as a two part mold, or the way that I chose….I poured a little ComposiMold into a cup and let that solidify first. Then I placed the dinosaur into the cup and poured a little more ComposiMold around its feet and torso and let that solidify. This ComposiMold held the dinosaur in place while we made the rest of the mold. Because we did not cool the first part of the mold or put a mold release in between the layers, the ComposiMold will melt together.
Another advantage of ComposiMold is that it is transparent. We can see where the dinosaur is within the mold. This lets us cut the parting line where we want it to be.
We could also have done this as a two part mold, but this seemed easier. Maybe we can do a two part mold next time… just to show the difference.
I assumed that the people who made this dinosaur originally put their parting lines in good spots, I decided to copy where they put them. But since I used a rubber mold making material, I need less of a parting line. I cut from the top so I could remove the part without damaging the feet and tiny hands.
I used Resin Obsessions Clear Casting Resin…This was my first time using that resin. It was thin for easy pouring and easily colored with different color dyes…also from Resin Obsessions.
I made several dinosaurs with this mold. Then, because I can, and ComposiMold is awesome like this, I remelted it to make a new mold. I made a rabbit to keep the town safe from the Dinosaurs!
Thank you for watching, and please let us know what we can do to help!
ComposiMold-FC is a
100% reusable mold making material for chocolate, fondants, gum paste
castings, and more. It's a flexible, rubbery, mold making material that
works by melting and pouring. Many casts can be made using the same
mold. ComposiMold-FC is good for the mold maker and confectionery artist
because it can be reused to make different molds without worrying about
wasting mold making material.
ComposiMold-FC is what we are demonstrating in
today's video. We've placed a big stamp that you can buy in a craft store into a tin foil "mold box", coated it with Food Contact Safe Mold Release, and poured our melted ComposiMold-FC to cover the stamp. After the mold making material cooled and solidified, we removed the stamp, and looked at the awesome detail we picked up!
You can see we used milk chocolate as our casting material first and then we pressed purple fondant into it next. You can keep making castings until you have as many as you need.
Once you are finished with this mold, simply remelt the material and pour it over your next object. The possibilities are endless when it comes to custom cake decorating, sweet party favors, and one-of-a-kind edible gifts!
Please share this video and tell everyone you know about ComposiMold! Plus subscribe to see the next amazing blog post from ComposiMold!
ComposiMold-Firm is a firm mold making material that is also a
100% reusable mold making material. It works by melting and pouring.
ComposiMold-Firm is a flexible, rubbery, thermoplastic that is great for
mold parts that require a stiffer mold making material. It is
compatible with many different casting materials including clays,
plaster, cement, epoxy, polyurethane, and many others. You can use
ComposiMold-Firm for polymer clay push molds such as Sculpey molds or
Fimo molds.
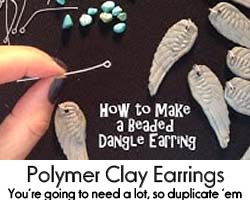
This is what we are demonstrating in today's video, Sculpey being pressed into the ComposiMold-Firm mold. Being stiff enough to handle the pressure of the push-mold technique is one of ComposiMold-Firm's best features. The delicate casting will not become warped by a too flimsy mold. See for yourself, how we make earrings and apply the same technique to many arts and craft projects!
https://youtu.be/qrkj0BV78x4
Please share this video and tell everyone you know about ComposiMold! Plus, subscribe to see the next amazing blog post from ComposiMold!
Today's project displays a mold of a toy rhino that we made a few cuts in to be sure we could de-mold the fragile casting without breaking off it's legs. This is called a 2 or 3 part mold and it allows you to bend the ComposiMold mold away from the casting.
Melted crayon art is a super fun arts and crafts project to do with kids or to make for kid's gifts. Think about making crayons in the shape of any children's toy! ComposiMold is the secret ingredient here!
Please share this video and tell everyone you know about ComposiMold! Plus subscribe to see the next amazing blog post from ComposiMold!
Today June 3, 2015, our sales director’s daughter Madelyn turns 7 and Mike wanted to create something original and memorable for her birthday. So in today’s video, Mike shows off his daughter’s new Shopkins character necklace that he made using ComposiMold and Clear Casting Plastic, a high quality epoxy resin. This one of a kind, handmade, accessory features a Season Two Bakery Shopkins. Who is it? Slick Breadstick, Mary Muffin, Carrie Carrot Cake, Mary Meringue, Pecana Pie, Fifi Fruit Tart, Danni Danish, Cupcake Chic?
No, it’s Choco Lava, a chocolate lava cake with chocolate "lava" ganache dripping down her face. She is topped with a dollop of whipped cream and a pink strawberry, and she makes some very tasty looking birthday jewelry. Maddy is one lucky girl.
Please tell us what you'd like us to mold next! Thanks for watching!
Please share this video and tell everyone you know about ComposiMold! Plus subscribe to see the next amazing blog post from ComposiMold!