Showing posts with label Casting materials. Show all posts

Monday, November 5, 2018

Tips for Different Casting Materials

So many casting material choices! Here we talk about what and how you can cast in ComposiMold and ImPRESSive Putty Molds.

EPOXIES: Epoxy Resins, Epoxy Putty, or Epoxy Clay
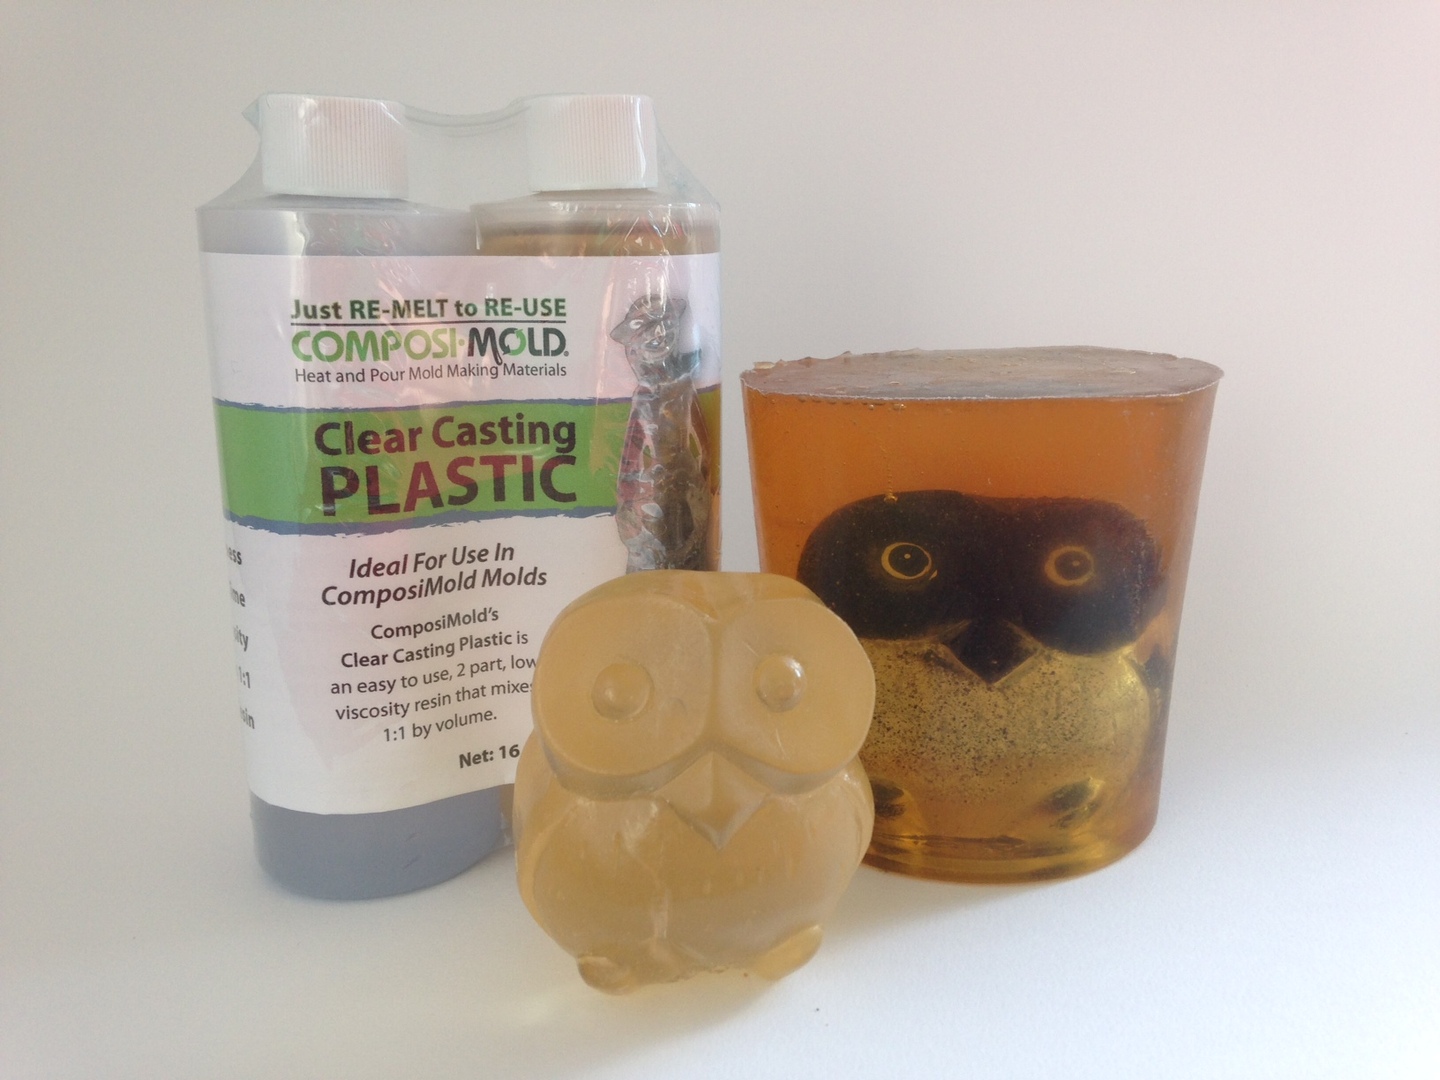
The best tip is to use ComposiMold Epoxy Resin (of course :) ).  ComposiCast resins are very forgiving because you can be off by 10% or more and still get great plastic castings. We are finding that some of the very cheap epoxies are leaving a whitish surface, I believe because of the diluent added to reduce the cost. This is also why those resins don’t harden well sometimes if there is more humidity. This isn’t an issue if you are adding colorants. Use ComposiCast White or Black, or use ComposiCast Clear with different colorants when using the epoxy in ImPRESSive Putty. For larger castings of 8+ cubic inches, choose epoxies with longer cure times of 24+ hours. Experiment with freezing the mold prior to pouring epoxy resins that create a lot of heat during curing. Epoxy resins that require an added heat source for curing are not recommended.
Astroboy Action Figure Casting: https://www.youtube.com/watch?v=T1bUl8dE8TU&

URETHANE OR POLYURETHANE:
For fast cure urethanes, use ImPRESSive Putty because it can handle higher temperatures. Choose a urethane with a longer cure time. These create less heat as they cure. You can also experiment with freezing the mold prior to pouring higher temperature urethane resins, adding fillers, or pouring in intervals. Be sure to use talc powder/baby powder as your mold release before each casting made. Urethanes dislike moisture so the talcum powder makes a nice moisture barrier.

PLASTER/CONCRETE:
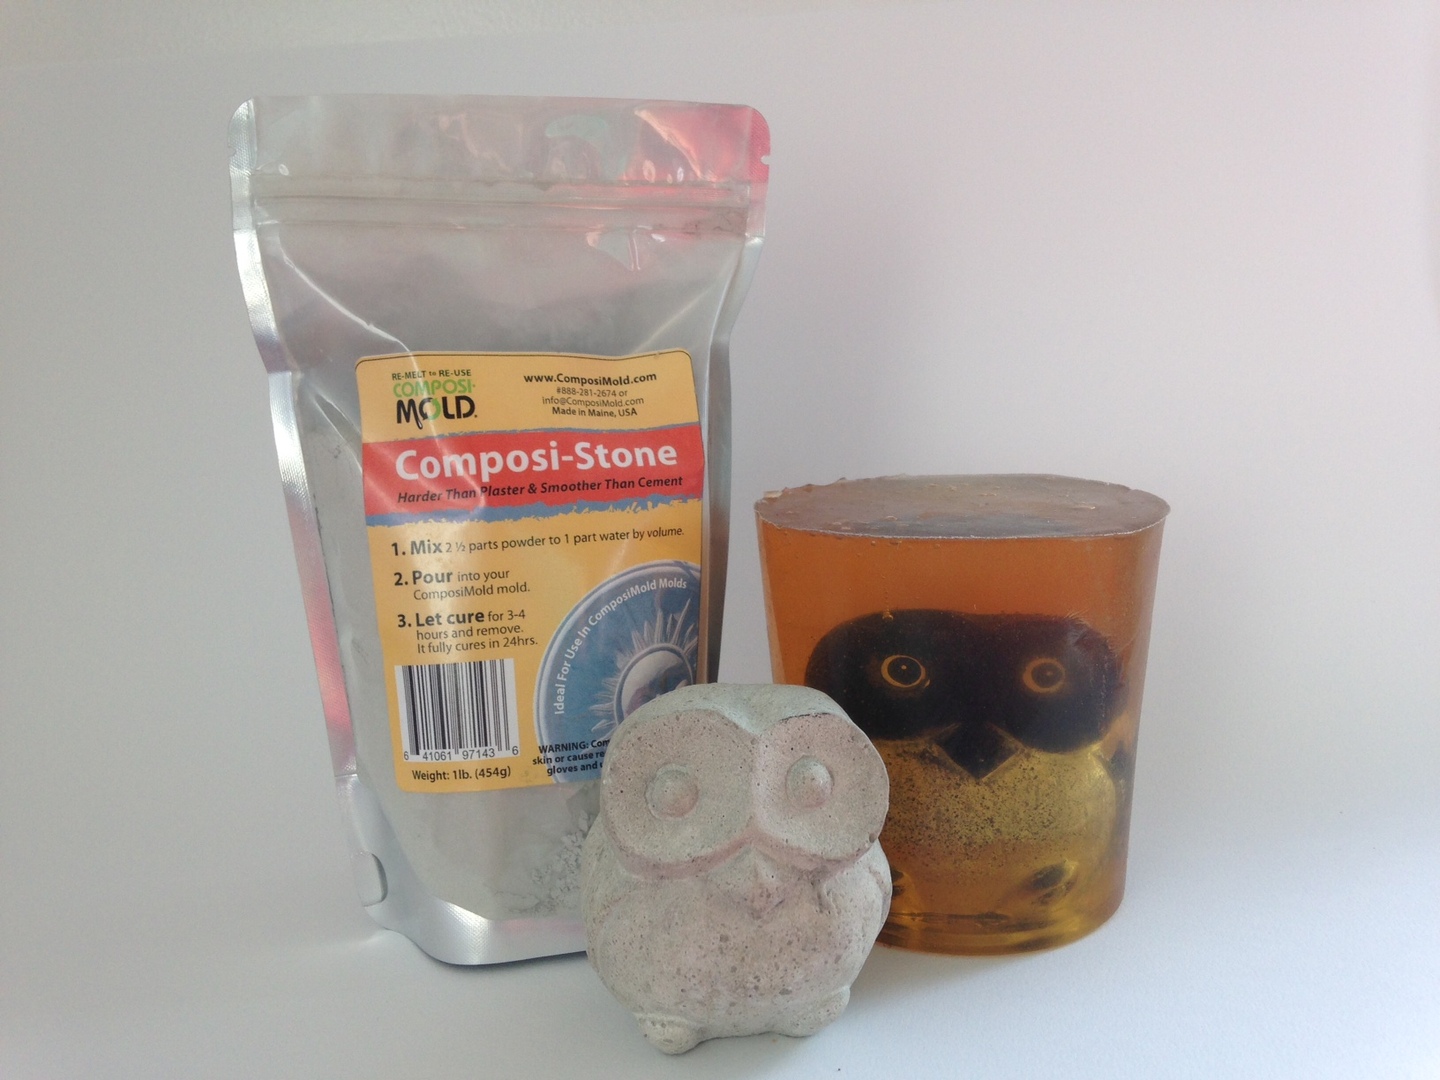
ComposiMold’s Plaster of Paris or add the Plaster Additive to give harder, stronger plasters in ComposiMold molds. Mix plaster and water together in a 72 parts plaster to 28 parts water, by weight, or to a toothpaste-like consistency.  The thicker the better for stronger molds. Use ComposiMold Plaster Additive in traditional plasters for strong, hard plaster. Fast curing masonry cements work great and cure extremely strong.  Follow instructions for mixing ratios. And we also have the ComposiStone for hard plasters.
Plaster Casting of Duck Decoy: https://www.youtube.com/watch?v=s_x2TM943yY&

SILICONE:
Silicones work great in ComposiMold mold or ImPRESSive Putty molds. Make castings with both platinum and tin cured silicone rubbers.
Soft Bait Fishing Lure Rubber: https://www.youtube.com/watch?v=JqmX8riVyJk&
SOAPS:
Chill the mold prior to pouring any higher temperature soaps (above 140ºF). Shea Butter and Glycerine Soap make great soaps!  For higher temperatures, use ImPRESSive Putty.

WAXES: (for candle molds or encaustic casting)
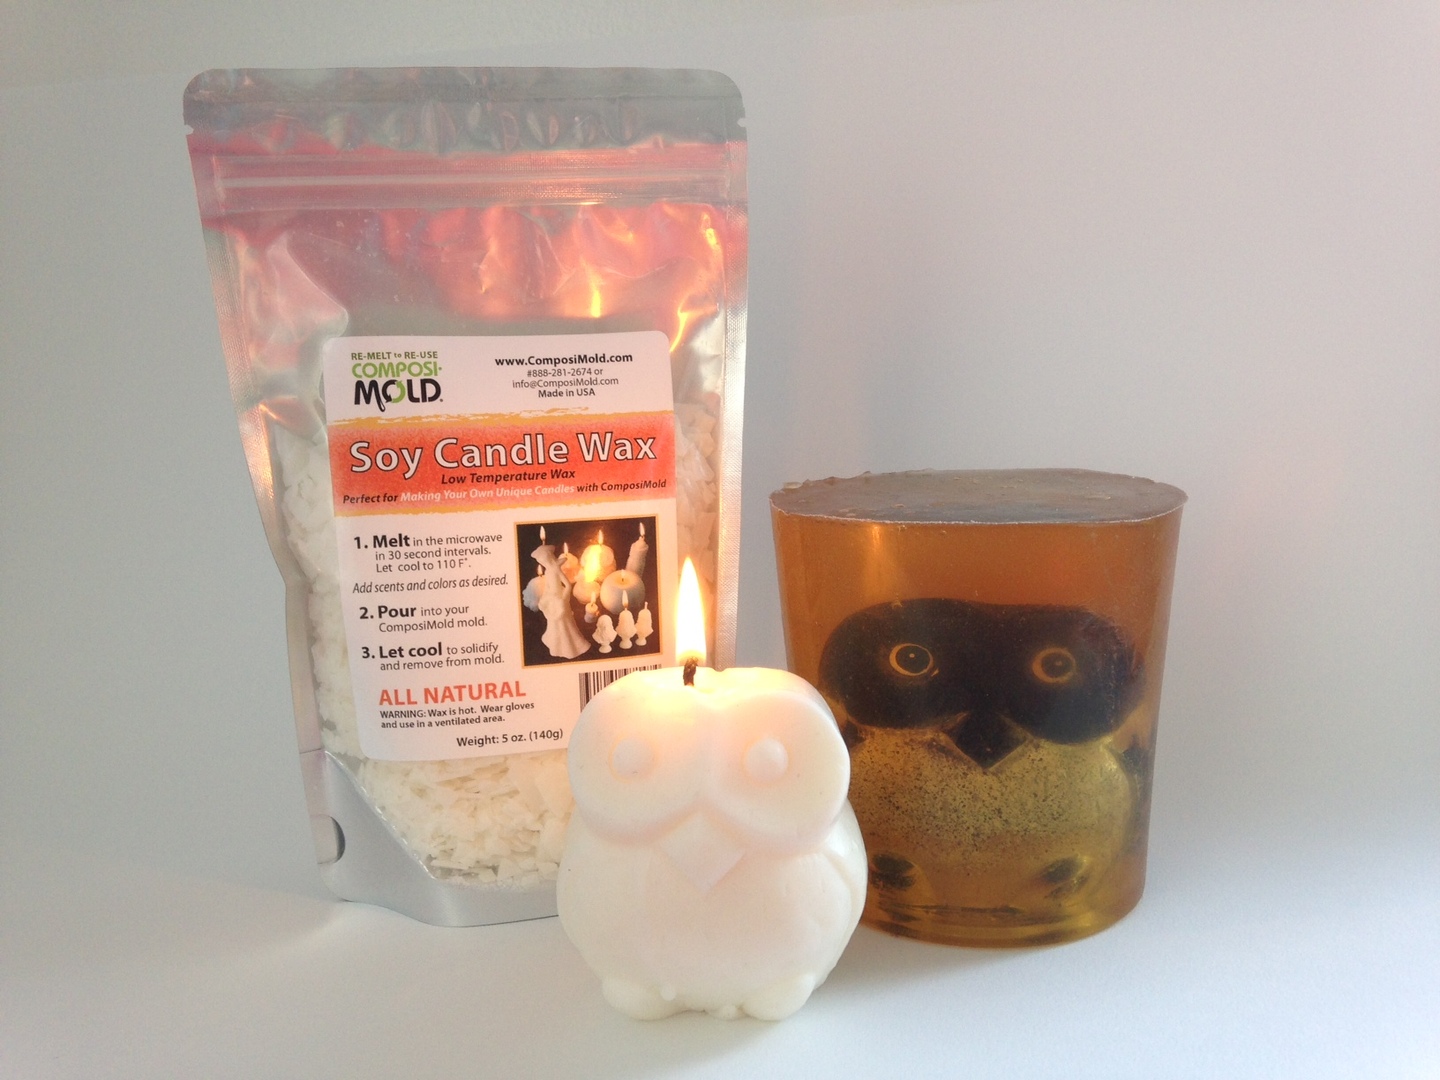
Soy, Paraffin, Beeswax, and Melted Crayons work really well. Chill the mold first for higher temperature waxes (above 140ºF). For higher temperatures, use ImPRESSive Putty, it works awesome (oh wait I said that above too).
Candles:

CLAYS, Polymer Clays, Metal Clays, Real Clay, Modelling Compounds, etc.
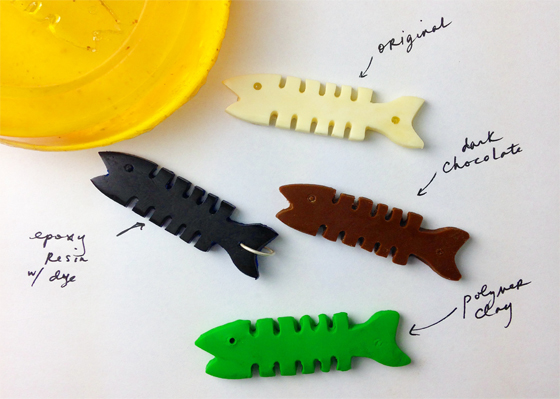
Use any type of polymer clay, modeling clay, putty, or real clay for push molding in a ComposiMold. Do not use clay in a slurry form or the water will degrade the mold.

HEAT FORMABLE PLASTIC
The plastic that is heated in hot water can be molded and formed using ImPRESSive Putty just like a push mold. Push it in, let it cool.
Push Mold of Heat Formable Plastic: https://www.youtube.com/watch?v=Sd_77tffByI

CHOCOLATE:
Pour or pipe many types of melted chocolate into your mold. Lightly tap or vibrate the mold to release air bubbles in the chocolate. No mold release is necessary for chocolates.

BUTTER
Butter fills funny as it doesn’t press back on you. Use soft butter and press it into your mold. Place it in the refrigerator to chill and harden.

FONDANT:
Press softened fondant into your mold with your hands or a rolling pin and remove immediately. No mold release is necessary for fondant.

ISOMALT or Sugar Candies
The Food Safe ImPRESSive Putty can withstand the heat for smaller candies. Several stores in Colorado have enjoyed making special candies this way. Larger molds, above about 3 cubic inches may have heat damage. Pour water in the mold and then wipe clean before making your mold to remove the activator from the surface of the mold.

Papier Mache:
Work by building up in layers and letting the layers dry before moving on. You can make some beautiful castings with just paper and glue.

ICE
Freeze your mold before pouring in cold water. Put back in the freezer to freeze the water. Chillingly good results J

Cookie Dough
Use a no-rise cookie recipe, so leave out the Baking Soda. Press the cookie dough into the mold, pull it out, and cook it.

GUMMIES
Make your own Gummi recipe, or Jell-O with ¼ of the water as they suggest. Use vegetable oil as a mold release. Make sure to get everywhere with the release or it will stick. Let the Gummi liquid cool to room temperature before pouring into your mold.
Venus Di Milo Gummi (Doh!) https://youtu.be/GaQ9DXi3L_U

METAL
You can use low melt metals, like our Wood’s Metal, in the ImPRESSive Putty. You can also use ComposiMold and ImPRESSive Putty for the lost wax process: Make a wax casting of your object, make a plaster mold of that wax object, burn it out, and then pour in your molten metal (easy! Right? Okay, this is pretty advanced).


You can also try adding fillers and dyes to casting materials, using ComposiMold as a rubber casting material, Modeling Compounds, Polyester Resin, Paper Mache and many more! You may also like our Re-usable Molding Putty, ImPRESSive Putty.

Tuesday, August 9, 2016

Ten Most Compatible Casting Materials with ComposiMold

Here are some quick tips for the variety of casting materials you can use in a ComposiMold mold:
EPOXIES: Epoxy Resins, Putty, or Clay
Epoxies work well for pieces up to 8 cubic inches. For larger castings of 8+ cubic inches, choose epoxies with longer cure times of 24+ hours. Experiment with freezing the mold prior to pouring epoxy resins that create a lot of heat during curing. Epoxy resins that require an added heat source for curing are not recommended.

Try our jewelry grade, crystal clear, Clear Casting Plastic for castings up to 6 cubic inches. Chill the mold for castings up to 20 cubic inches.

URETHANE OR POLYURETHANE:
Choose a urethane with a longer cure time. These create less heat as they cure. You can also experiment with freezing the mold prior to pouring higher temperature urethane resins. Be sure to use talc powder/baby powder as your mold release before each casting made.

SILICONE:
Silicones work great in ComposiMold molds. Make castings with both platinum or tin cured silicone rubbers.

PLASTER/CONCRETE:
Mix plaster and water together in a 72 parts plaster to 28 parts water, by weight, or to a toothpaste-like consistency. Traditional plasters cure well but leave a slight soft layer on the outside of the casting. To avoid this, apply a layer of Plaster Release to the mold before pouring casts. Fast curing masonry cements work great and cure extremely strong. Follow instructions for mixing ratios.

Try our ComposiStone formulation! It’s smooth like plaster but hard as concrete. It works very well in a ComposiMold mold.

SOAPS:
Shea Butter and Glycerine Soap make great soaps! Chill the mold prior to pouring any higher temperature soaps (above 140ºF).

WAXES: (for candle molds or encaustic casting)
Soy, Paraffin, Beeswax, and Melted Crayons work really well. Chill the mold first for higher temperature waxes (above 140ºF).

Try our all natural Soy Candle Wax for candle making and beautiful wax castings. Cools to a white, creamy finish!

CLAYS:
Use any type of polymer clay, modeling clay, putty, or real clay for push molding in a ComposiMold. Do not use clay in a slurry form or the water will degrade the mold.

CHOCOLATE:
Pour or pipe many types of melted chocolate into your mold. Lightly tap or vibrate the mold to release air bubbles in the chocolate. No mold release is necessary for chocolates.

FONDANT:
Press softened fondant into your mold with your hands or a rolling pin and remove immediately. No mold release is necessary for fondant.

When casting edible treats, you can also use: no-rise cookie dough recipes, gummies, gum paste, ice, butter, and more!

...AND MANY MORE:
For your art, craft, hobby, and hardware projects, you can also try: adding fillers and dyes to casting materials, ComposiMold itself as a rubber casting material, Modeling Compounds, Polyester Resin, Paper Mache and many more!

Do you have a question about using a specific casting material that was not answered here? Email or call anytime!


Please share this video and tell everyone you know about ComposiMold! Plus subscribe to see the next amazing blog post from ComposiMold!

Wednesday, December 2, 2015

How to Clone a Dinosaur Toy with ComposiMold


Katherine of Resin Obsession (http://resinobsession.com/) asked us to clone her dinosaur toy. She wanted to see how we do it, and she thought it would be a great way to show the power of ComposiMold to her customers.


So after she delivered the dinosaur to us, I got busy.


You never know the best way to make a mold. Even the best mold makers need to experiment to find out how they should set it up.


Where should you pour in your resin? Do you need to make a two part mold? Where should the parting lines be?


And that’s where ComposiMold comes in to play… it is reusable. I can experiment without worry, and without wasting materials.


So I did what I always do when starting a new mold making project…I experimented.


I placed the dinosaur into a cup and poured ComposiMold over it to see what happened…


I would like to say it worked perfectly and the mold is done and that’s the end of the story, but it’s not…well sort of…It did work just not the way it was supposed to.


The dinosaur didn’t float, but it didn’t stay on its feet. It flipped over onto its side…oops. Good thing I wasn’t using silicone rubber for my mold! First, I wouldn’t have known that it was flipped over because the silicone is opaque, second I would have wasted $30 on a messed up mold.


With ComposiMold,  I placed the mold in the refrigerator to cool off, started to pull out the dinosaur to do it again, when I realized that the mold turned out pretty good.


When it was solidified, I thought that the mold looked pretty good, so before remelting it, I poured a little more ComposiMold over the side to make it a little thicker, cut out the dinosaur and filled it with the epoxy just to see what it would be like…it was difficult to fill the small parts…I used a small wire to push the bubbles out of the hands and tail. So the mold worked. This blue dinosaur is actually a color changing dinosaur. When I add heat, it will turn clearer. (She’ll turn invisible!)


But since that wouldn’t make a good video I decided to do it again. Yes, I know. ComposiMold is cool…no wait, warm, warm when it’s melted. So I remelted the mold and did it again the “right” way so I can have it on video….


That great part is that I have not wasted any money or mold making material. I’ve experimented, learned the best way  to duplicate the action figure, and can do it again! Experiment #1 is a success.


First I coat the dinosaur with a thin layer of mold release, and then spray it with Bubble Buster to reduce the chances of bubbles sticking to the part.


To hold the dinosaur in place now that I know it will flip over, I have several options. I can glue it in place, do it as a two part mold, or the way that I chose….I poured a little ComposiMold into a cup and let that solidify first. Then I placed the dinosaur into the cup and poured a little more ComposiMold around its feet and torso and let that solidify. This ComposiMold held the dinosaur in place while we made the rest of the mold. Because we did not cool the first part of the mold or put a mold release in between the layers, the ComposiMold will melt together.


Another advantage of ComposiMold is that it is transparent. We can see where the dinosaur is within the mold. This lets us cut the parting line where we want it to be.


We could also have done this as a two part mold, but this seemed easier. Maybe we can do a two part mold next time… just to show the difference.


I assumed that the people who made this dinosaur originally put their parting lines in good spots, I decided to copy where they put them. But since I used a rubber mold making material, I need less of a parting line. I cut from the top so I could remove the part without damaging the feet and tiny hands.


I used Resin Obsessions Clear Casting Resin…This was my first time using that resin. It was thin for easy pouring and easily colored with different color dyes…also from Resin Obsessions.

I made several dinosaurs with this mold. Then, because I can, and ComposiMold is awesome like this, I remelted it to make a new mold. I made a rabbit to keep the town safe from the Dinosaurs!

Thank you for watching, and please let us know what we can do to help!


Free ebook is available at: http://composimold.com/ebook.html


Please share this video and tell everyone you know about ComposiMold! Plus subscribe to see the next amazing blog post from ComposiMold!

Wednesday, October 28, 2015

Which ComposiMold Reusable Mold Making Material Should You Use?

Let's make one thing clear! We do not want to confuse you! Currently, ComposiMold comes in four heat-and-pour varieties and we've just released a putty version too! So which one do you choose when it's time to make your project? It depends on your preferred casting materials or your preferred casting technique. Here's a quick guide to help you find the right material for you!

Casting Materials
Soft Casting Materials ie.chocolate, wax, soap: ComposiMold-Flex
Edible Casting Materials: ComposiMold-FC (All Heat and Pour Materials are food contact safe)
Polymer Clay OR Fondant for push molding: ComposiMold Firm
Plastic, Epoxy, Urethane/Plaster, Concrete, ComposiStone: ComposiMold-Original 


Casting Technique
Push Molding: ComposiMold-Firm

If you'd rather use a material that you can press onto your master object, instead of pouring over your master object, choose ReMold Putty. This material works great with higher temperature casting materials and for making molds of objects that cannot be moved to a mold box.


Heat and Pour Mold Making Materials 

ComposiMold-Original Not Too Firm, Not Too Soft, Compatible With Dozens of Casting Materials
The original Reusable Mold Making Material. When you are tired of wasting your money on silicone molds, stop worrying and start using ComposiMold, a 100% reusable mold making material that works by melting and pouring. NON TOXIC, MICROWAVEABLE, AND REUSABLE OVER 35 TIMES!

ComposiMold-Food Contact Specially Made For Your Edible Treats!
ComposiMold-FC is specifically made for casting Edible Treats! Now you can make your own chocolate molds! Think of it as 35 unique molds for the price of one silicone mold. Remember, it's remeltable and reusable, food contact safe, and perfect for chocolates, fondants, gum paste, and more.

ComposiMold-Firm For Push Molds
Specially formulated for push molds. ComposiMold-Firm has a Shore A hardness of about 20-25 at room temperature and works great for polymer clay push molds or conventional clay push molds. Some cake artists also prefer the stiffer molding material for fondant push molds.

ComposiMold-Flex Flexible Molds for Soft Casting Materials
Designed for those who want a more flexible mold. ComposiMold-Flex is perfect for chocolate, waxes, soaps, and other soft casting materials. The ComposiMold-Flex allows you to pull the mold away from the soft casting material without damaging or breaking your creation.

Reusable Mold Making Putty

ImPRESSive ReMold Mold Putty
Make a Mold by applying Putty Directly to Object Being Molded
Can be applied directly to almost any model, capturing the finest detail and curing within minutes. ImPRESSive Putty can be used to make molds of sculptures, prototypes, candles, picture frames, coins, etc. You can cast wax, clay, low melt plastics, low melt metal, and a variety of resins into Re-Usable Mold Putty. ImPRESSive Putty may be remelted and used over and over. No expensive equipment is necessary. Currently, not available for food contact.

Please subscribe to see the next blog post from ComposiMold!
For More Information Visit: 

Wednesday, October 21, 2015

The Science of Why We Can Pour Hot Casting Materials into Cold ComposiMold

Making a mold with ComposiMold is easy. Simply, bring the temperature of ComposiMold above 135 F and pour! To solidify, just cool to room temperature.

Due to thermoconductivity, you can still use casting materials in this mold that are above 135 F and they won't destroy your mold. Rubbers, such as ComposiMold, have low thermoconductivity. This means it takes longer for the heat to travel from hot casting materials into the ComposiMold mold. The hot materials will set up before heating the ComposiMold.

You can actually pour casting materials into ComposiMold up to about 180 F even though ComposiMold melts at about 135 F. You can do this by chilling the ComposiMold mold first. For example, beeswax makes a great candle, but it melts at 145 F, so you need to cool the.ComposiMold mold by placing the mold in the refrigerator or freezer and then pouring in the melted beeswax.

So by chilling the ComposiMold, it takes much longer for the mold's temperature to reach its melting point. However, if you chill it to 30 F, it must heat up over 100 degrees before it melts.

The casting material, such as the wax or soap, only has to drop its temperature a few degrees before it begins to solidify. Also, waxes and soaps cool from the outside to the inside (unlike metals that cool from inside/out). So as they cool you create a barrier of wax that also helps protect the ComposiMold.

Be sure to chill the mold prior to each casting made. This will ensure that your mold doesn't get destroyed and that your mold making and casting experience is a success.

Please subscribe to see the next amazing blog post from ComposiMold!

Tuesday, September 15, 2015

One-of-a-Kind Chocolate Shapes


Make one-of-a-kind chocolate shapes with EASY MAKE IT Chocolate helps make any occasion just a little bit sweeter


This easy-to-use, flexible mold making material allows you and to turn almost any object into chocolate or fondant! This new and improved mold making product is reusable, certified food contact safe, and picks up fine detail! Its flexibility makes it perfect for de-molding delicate chocolate shapes.

EASY MAKE IT Chocolate comes in two sizes:
6oz., $17.99
20oz $34.99

To learn more about how to turn your thoughts into creations through mold making sign-up for this FREE eBook---a molding making success guide: Follow the link below- http://composimold.com/Ebook.html

ComposiMold mold making materials are reusable. They allow for continuous mold making without the worry.


What are you going to make today?

Please share this video and tell everyone you know about ComposiMold! Plus subscribe to see the next amazing blog post from ComposiMold!


Friday, January 30, 2015

What is Plaster

Plaster is dry powders that are mixed with water to form a soft but brittle solid.There are many different uses for plaster.
It is used to create art and for coating walls and ceilings.  Investigators use plaster to make duplicates of footprint impressions or tire marks, dentists use plaster to make castings for dental work, and doctors use plaster for putting a cast over a broken bone. The most common use of plaster is for general repair and maintenance around the home including repairing dents and holes in walls and filling in holes before painting.

Gypsum plaster, or plaster of Paris, is produced by heating gypsum to about 300 °F. Artist use gypsum to simulate the appearance of wood, stone and metal, on movie a sets. This is the typical material used for art sculpture and mold making.

Lime plaster is a mixture of calcium hydroxide and sand or other filers.  Carbon dioxide in the atmosphere causes lime plaster to set by transforming the calcium hydroxide into limestone AKA calcium carbonate. To make lime plaster, limestone is heated to produce quicklime, which is calcium oxide. Water is then added to produce slaked lime, or calcium hydroxide. This is sold as a wet putty or a white powder. When exposed to the atmosphere, the slaked lime very slowly turns back into limestone through reaction with atmospheric carbon dioxide, causing the plaster to increase in strength.

Cement plaster is amixture of plaster, sand, cement, and water.  This is normally applied to masonry interiors and exteriors to achieve a smooth surface. Cement plaster was first introduced in America around 1909 and was often called by the generic name adamant plaster after a prominent manufacturer of the time. The advantages of cement plaster  are good strength, hardness, fast quick setting time, and durability (for outdoor use).

Plaster, plaster of Paris, or other versions such as hydrocal or ultracal, may be used as a casting material just like other materials such as soap, wax, concrete, or plastic resin. The benefits of using plaster is its relatively low cost, simple ingredients, and good castability. Depending of the version of plaster used, casting times range from 20 minutes to 24 hours. Like cement, the plaster castings become stronger over time and typically reach its strongest after about a month.

There are many types of mold making material that will work while using plaster as a casting material including latex, silicone, and ComposiMold. When casting with plaster, the finished product can be painted with most types of paint.

For More Information Visit:www.ComposiMold.com, www.Facebook.com/ComposiMold, www.YouTube.com/ComposiMold To Order ComposiMold Products Visit: www.store.composimold.com

Tuesday, January 6, 2015

What is Casting


Casting is a process where liquid or semi-liquid material is poured into a mold. The mold is the inverse of the shape you want to make into a duplicate and comes in many shapes. It often contains a hollow cavity of the desired shape. Casting materials can be various cold setting materials, polymer, clays, hot melts, or metals. Cold setting materials typically may cure after mixing two or more components. Examples include: epoxy, concrete, plaster and clay.

Plaster and other chemical curing materials such as concrete and plastic resin may be cast using reusable mold making material. Using mold making material that is reusable allows for multiple casting projects from the same material and can save money and prevent frustrations.  By casting plaster, hydrocal, ultracal, concrete, or cement into your molds you can create unique sculptures, fountains, bird baths and more.


Cold set resin casting is used to make plastic casts. The mold is filled with a synthetic 2 part resin that is mixed together and hardens overtime. These casts can be used for small-scale production like industrial prototypes, toys, and jewelry. Hobbyists use plastic resins in their molds to reproduce collectible toys, rock walls, models, backdrops, broken parts, and figures. Jewelry makers use plastics resins to makes beads and earrings.

Clay and polymer clay are used for casting and is generally pushed into a mold.  Clays are plastic due to their water content and becomes hard, brittle and non–plastic upon drying or firing. Casting with clay is great for art projects and clay may be used to create a master for a mold. The polymer clay, such as Sculpey™ or FIMO™, or polymer metal clay is cast the same way as typical clay cast, by pushing the clay into the mold cavity.


Casting can also be performed using hot melt materials such as candle wax casting or soap castings. The process for making a wax casting or soap casting works through the melting of the soap or wax and pouring the liquid into the mold cavity. Instead of mixing two parts together, the wax or soap cools to solidify.

Casting is a useful tool to enable the duplication and creation of unique parts and shapes. There is anthropological evidence that people have been solving problems by casting parts since 500 B.C. So, if your favorite thing is broken and you want it replaced, consider making a mold and casting a part. For more information about molding and casting and associated materials visits 
http://www.composimold.com/.

For More Information Visit: www.ComposiMold.com, www.Facebook.com/ComposiMold,www.YouTube.com/ComposiMold To Order ComposiMold Products Visit: www.store.composimold.com

Wednesday, August 13, 2014

DIY Robot Mold Making, Casting, and Arduino Remote Control


Shawn has just completed a ComposiMold project that utilizes 6 different casting materials. This project demonstrates one of ComposiMold's greatest features; it's versatility. This robot casting was made in 5 separate molds and the casting materials consist of; ComposiStone Concrete/Plaster Mixture, ProtoCast 85R Urethane Resin, PureCast 605 Urethane Resin, Decoupage, Delight Modeling Compound, and Silicone Rubber.  Watch the video below to learn how he made this character in 5 different ComposiMold molds and even made him talk and light up too!


Parts List:
ComposiStone (2lbs), Hot glue, Spray adhesive, PureCast605, Elmer’s Glue, Used ComposiMold, ProtoCast85R, Water, Toy Robot, Silicone, Cardboard Box’s, Paint, Colored tissue Paper, Cups, Wires, Delight Paper Clay, Plastic bags/ trash bags, Breadboard, Recordable Card, Controller, Ferrules, Electric Switch, Receiver, Electrical tape, Rubber gloves, Packing tape, LED Lights, Clay, Bubble Buster, Mold Release, Arduino, Stir Sticks, Plates/tray for mixing paint.

The Amount of ComposiMold used for each part of the robot is as follows:
• Arms..3.7Lbs each
• Head.. 1Lb
• Legs ….10.4Lbs
• Body…9.3Lbs

Equipment:
Microwave, Hot glue gun, Laptop, Pliers, Scissors, Scale, USB to mini USB, Wire strippers.

Outline of the Video:
The video starts with creating the mold box using a cardboard box, plastic bag, and spray adhesive followed by preparing the robots legs by anchoring them down with clay, spraying them with bubble buster and mold release.

The ComposiMold is melted down in a microwave and poured over the prepped Robot legs. After the mold is poured; the ComposiMold is left to cool to solidify.

The legs are removed by cutting and flexing the rubbery mold. The mold is taped up in preparation for the casting material.

Then the various types of casting materials used for each of the robots five body parts are demonstrated. The robots legs are first up; ComposiStone (Plaster like material) is mixed and poured into the mold. Next I explain how the robots head was casted with PureCast 605 and how I was able to embed LED lights in the material. Then I explain how the body was casted using ProtoCast85R. I will then go over how to cast one of the arms using decoupage and delight modeling compound. The other arm is casted in silicone; were I start by showing how to mix the material followed by pouring and later removing the piece from the mold. Next we paint the robot, wire the Arduino, write the code, and start playing with the remote control robot!

For More Information visit: www.ComposiMold.com

Thursday, June 27, 2013

5 Easy Casting Material Recipes That Make Great Castings with ComposiMold Molds

So the ComposiMold saying goes like this: Make more molds with 1 pound of ComposiMold than with 30 pounds of other mold making materials. This is because ComposiMold can be re-melted and re-used to make a new mold.

But what about casting materials?

Here we show you 5 recipes of casting materials that you can make yourself and then use to make castings. They are inexpensive and with care can make great castings.

Casting material Recipes:

Paper Mache
Here’s an easy recipe: water, flour, and paper. Watch this video on paper mache casting.


Great for simple 1 part castings. Two part castings may be done as two separate parts that are then put together in segments. Be sure to give each layer enough time to dry. Make the first layer thin and let it dry very well before putting on the next layer. Use cold water also.


Fondant Casting Materials
This is the tastiest casting material (except maybe chocolate!).This recipe is from http://thecookduke.com/fondant-recipe/. And I must say I was very happy with it! One of the few fondants that I could not stop eating it tasted so good. To cast with it. Just push the fondant into the mold like a push mold.  The video shows this process:

Ingredients to make the fondant recipe:
o   1 Tbsp of unflavored gelatin
o   1/4 cup of cold water
o   1 tsp of almond extract (I prefer to switch this with vanilla extract)
o   1/2 cup of light corn syrup (If a corn syrup is not available, you can substitute it with a sugar syrup made with 1-1/4 cups sugar and 1/3 cup water, boiled together until syrupy)
o   1 Tbsp of glycerin (some recipes say it’s optional, believe me, it’s a must)
o   2 lbs 10X confectioners’ sugar
o   1/2 tsp of white vegetable shortening
Directions how to make the fondant recipe:
o   Sprinkle the gelatin over cold water in a small bowl and let it rest for 2 minutes to soften
o   Place the bowl in a microwave for 30 seconds on High, until the gelatin dissolves
o   Add the Almond or vanilla extract
o   Add the corn syrup and the glycerin and stir until the mixture is smooth and clear (if the mixture is not turning smooth and clear, microwave it for an additional 15 to 20 seconds on high and stir again)
o   Sift 1 1/2 pounds of the sugar into a large bowl
o   Make a hole in the sugar and pour the liquid mixture to it
o   Stir with a wooden spoon until the mixture becomes sticky
o   Sift some of the remaining 1/2 pound of sugar onto a smooth work surface and add as much of the remaining sugar as the mixture will take
o   Knead the fondant, adding a little more sugar if necessary, to form a smooth, pliable mass
o   Rub the vegetable shortening on your thumbs and knead it into the fondant
o   Wrap the fondant in plastic wrap and place it in a tightly sealed container to prevent it from drying out
o   If the icing dries out and harden it can often be revived by popping it into a microwave oven for a few seconds and then kneading it back to life

Paper Clay or Air Dry Clay.
Paper clay works as an air dry casting material, so you mold it in the ComposiMold and then pull it out to let it dry. This is the same process you use for polymer clay or clay mold making. This is also the same as the fondant castings.
The recipe we really like is from: http://dahlhartlane.blogspot.com/2011/10/how-to-make-paper-clay.html. The process basically combines a the rayon fiber from toilet paper with the plaster from the joint compound and PVA glue.
Ingredients: 2 Cups toilet paper
1 Cup regular joint compound
3/4 Cups paper mache paste or Elmers glue (much cheaper to use your own paste).
3/4 Cups flour
Mix them all together in a blender and your hands. Keep the remainder covered so it doesn’t dry out.

Plaster Casting: 
      I add plaster and concrete onto this list of recipes because they are so inexpensive. The Plaster of Paris at the hardware store costs well less than a dollar a pound. Use a 70:30 ratio of plaster to water by weight or thicker. The thicker your plaster mixture, the stronger your casting will be. Tap or vibrate the sides to help pull the bubbles out. Here’s a video showing how to make the molds and castings for the plaster.


Concrete Mold Making and Casting
       Also, super cheap casting material. You will be surprised at the detail you can get with concrete and cement. Cement is the limestone part of the concrete. Concrete has the agglomerates such as rock or gravel in it. The cement by itself won’t be as strong as the concrete, but you can mix it with sand or other particles to make a nice finish. Keep the water content as low as possible. See the video below for concrete instructions:


And the best part, is you can keep on experimenting with ComposiMold molds!


"ComposiMold's greatest advantage is it's reusability".


Saturday, December 22, 2012

Cast Chocolate and then Soap in the Same Mold

There are few mold making supplies as versatile as ComposiMold. We are always touting it's reusability as it's most beneficial feature. However when you consider that ComposiMold can handle such a range of casting materials from concrete to fondant, you'll be convinced that it's the only mold making tool you'll need in your supply closet!

This week I will demonstrate that in the very same mold I can cast chocolates, wipe away any sweet debris, and then cast glycerin soaps from the same mold! (Note: you would not want to cast these two materials in the opposite order...remember, chocolate first! And as soon as I cast a non food item in my ComposiMold-FC it can only be used for casting non-food items in the future.)

I wiped the excess chocolate debris off my mold with a wet paper towel. Be sure to dry it right away because ComposiMold biodegrades in water.

I used food coloring and essential oils in my white glycerin soap.

Yellow and red make orange!

However all the colors makes some kind of purple...

Here are the soaps de-molded next to the original parts.

As you can see here, this one mold was used to cast both chocolate shapes and soap shapes. Thanks to ComposiMold's versatility I can do that!

What kid wouldn't want to take a tub with these soaps shaped like their play toys?
Remember, this was just a demonstration of how versatile ComposiMold is. Be careful not to use edible casting materials AFTER you use a non food items as casting materials. Keep your ComposiMold-FC and ComposiMold-LT seperate.

Happy Mold-Making! Michelle

 For More Information visit: www.ComposiMold.com www.Facebook.com/ComposiMold www.YouTube.com/ComposiMold order at www.ComposiTherm.com