Showing posts with label casting urethane. Show all posts

Wednesday, December 14, 2016

Urethane Resin Casting for Awesome Molds

Use either ComposiMold or ImPressive Putty for Urethane castings.

Many people use urethane resins because of their versatility and relatively simple use. Most urethane casting materials are 1:1 mixes with short casting times ranging from 1 to 30 minutes. Urethane plastics are used for making models, prototypes, crafts, and art pieces. 
Polyurethane resin casting in ComposiMold

Urethane resin in ImPRESSive Putty

Quick tip for success with urethane casting resins and ComposiMold:
With ImPRESSive Putty, faster cure urethane casting resins work really well. The mold making putty can handle the higher temperatures of the fast cure urethanes. 

For ComposiMold, choose a urethane with a longer cure time. These create less heat as they cure. You can also experiment with freezing the mold prior to pouring higher temperature urethane resins. Be sure to use talc powder/baby powder as your mold release before each casting made.

ComposiMold works very well with many urethane resins. However, there are two potential issues with some urethanes:
  • Some fast cure urethanes create a lot of heat when they cure, which can melt the ComposiMold. You can work around this by chilling your mold first, adding fillers into the urethane before casting, or pouring the resin in intervals.
  • Some urethanes are very sensitive to moisture. Use talcum powder as a mold release to reduce any moisture from the mold from reacting with the urethane.
  • Use a mold release that is designed for polyurethane casting.

ComposiMold has two urethane resins available that we believe work very well with ComposiMold:

Urethane resins require dry fillers. Any water will create bubbles and heat. If you using powdered fillers in the polyurethane, dry the material in the oven at low temperatures for 15 to 30 minutes prior to mixing. 
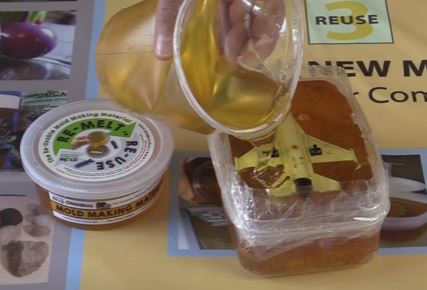
Pouring ComposiMold mold for resin casting

Making wheels from Urethane resin in ComposiMold mold


Visit Polyurethane Casting with ComposiMold for videos.

Please share this video and tell everyone you know about ComposiMold! Plus subscribe to see the next amazing blog post from ComposiMold!


Monday, October 20, 2014

iHobby 2014, ComposiMold Team Makes a Friend & Repairs Suitcase

I had not been to Chicago in several years, so when Stan asked me if Shannon would be ok with me taking a week long trip to the 30th annual iHobby Expo in Schaumburg, Illinois on very short notice, Shannon reluctantly said, “yes.”

Our trip was awesome. I met some tremendous people, got to visit downtown Chicago, saw the Bean, heard a dude singing Johnny Cash on the ramp to the Subway, and learned how to mold, cast and repair  a suitcase on location at the iHobby Expo 2014.


I think Stan was regretting hiring me after I quickly volunteered him to help fix the handle on Robert Trost’s favorite suitcase while we were displaying ComposiMold at the iHobby Expo 2014 at the Schaumburg Convention Center.

Robert explained that he was missing his trusty suitcase, and even though the manufacturer replaced it with a new model, the new one was just not the same. The suitcase company, known for its high quality travel luggage, was unable to provide Robert with the part for the discontinued suitcase and Robert was left using a travel bag that didn’t suit him. So, remembering seeing ComposiMold before and reading that we would be at the iHobby Expo, he brought the broken suitcase part, hoping we could help him make it functional again.


With the exuberance of my daughters on Halloween, I told Robert that of course we would help him fix this part! Then I watched the color drain from Stan’s face. I got a little worried until Stan, without hesitation, told Robert that we would do our best without any guarantees.

I can completely understand Robert’s connection to his travel companion. He explained that it was strong, sturdy and easy to negotiate, and simply traveling without it was not as pleasurable as it was traveling with his favorite suitcase. He was protective of the broken master part that needed to be glued together to be used as the master for the mold. However, we assured him he would lose nothing, it was worth a try! Robert relaxed and enjoyed watching the process of molding and casting the broken part as much as I did.

Recasting the suitcase part was a three day, ten-step project:

Step One: glue the master back together

Step Two: make a mold-box out of tinfoil

Step Three: use clay to secure the master to the mold-box and attach a lump of clay to the master part to create a sprue. The sprue will be the entry point to pour the urethane in Step Eight.

Step Four: spray master with Mold Release and then Bubble Buster  

Step Five: melt and pour ComposiMold into the mold-box until the master is completely covered by ½”

Step Six: wait 4 or 5 hours for ComposiMold to cool back to its flexible consistency and remove master from molding box

Step Seven: spray mold with mold release

Step Eight: mix epoxy per directions and pour into mold via the sprue

Step Nine: wait for urethane to cure per directions and remove casted part from mold

Step Ten: shape part by cutting and sanding off the sprue shape, install, and start using favorite suitcase.

Everything worked out splendid and we were thrilled when Robert emailed me the final results of iHobby Expo 2014 Suitcase Repair Project.


Hello Mike,

I want to thank you guys again for the part you molded for me.After a little cutting and sanding I was able to fit the part into the handle and assemble it again. Now I can use my favorite suitcase again!
          Kind regards,


          Robert Trost
          Hickory, NC 

So, please next time you break your favorite item whether it be a suitcase, model train, or bathroom fixture consider trying to fix it using ComposiMold, the one part, reusable re-meltable, mold making material.


For More Information Visit: www.ComposiMold.com,www.Facebook.com/ComposiMold, www.YouTube.com/ComposiMold To Order ComposiMold Products Visit: www.store.composimold.com

Wednesday, August 13, 2014

DIY Robot Mold Making, Casting, and Arduino Remote Control


Shawn has just completed a ComposiMold project that utilizes 6 different casting materials. This project demonstrates one of ComposiMold's greatest features; it's versatility. This robot casting was made in 5 separate molds and the casting materials consist of; ComposiStone Concrete/Plaster Mixture, ProtoCast 85R Urethane Resin, PureCast 605 Urethane Resin, Decoupage, Delight Modeling Compound, and Silicone Rubber.  Watch the video below to learn how he made this character in 5 different ComposiMold molds and even made him talk and light up too!


Parts List:
ComposiStone (2lbs), Hot glue, Spray adhesive, PureCast605, Elmer’s Glue, Used ComposiMold, ProtoCast85R, Water, Toy Robot, Silicone, Cardboard Box’s, Paint, Colored tissue Paper, Cups, Wires, Delight Paper Clay, Plastic bags/ trash bags, Breadboard, Recordable Card, Controller, Ferrules, Electric Switch, Receiver, Electrical tape, Rubber gloves, Packing tape, LED Lights, Clay, Bubble Buster, Mold Release, Arduino, Stir Sticks, Plates/tray for mixing paint.

The Amount of ComposiMold used for each part of the robot is as follows:
• Arms..3.7Lbs each
• Head.. 1Lb
• Legs ….10.4Lbs
• Body…9.3Lbs

Equipment:
Microwave, Hot glue gun, Laptop, Pliers, Scissors, Scale, USB to mini USB, Wire strippers.

Outline of the Video:
The video starts with creating the mold box using a cardboard box, plastic bag, and spray adhesive followed by preparing the robots legs by anchoring them down with clay, spraying them with bubble buster and mold release.

The ComposiMold is melted down in a microwave and poured over the prepped Robot legs. After the mold is poured; the ComposiMold is left to cool to solidify.

The legs are removed by cutting and flexing the rubbery mold. The mold is taped up in preparation for the casting material.

Then the various types of casting materials used for each of the robots five body parts are demonstrated. The robots legs are first up; ComposiStone (Plaster like material) is mixed and poured into the mold. Next I explain how the robots head was casted with PureCast 605 and how I was able to embed LED lights in the material. Then I explain how the body was casted using ProtoCast85R. I will then go over how to cast one of the arms using decoupage and delight modeling compound. The other arm is casted in silicone; were I start by showing how to mix the material followed by pouring and later removing the piece from the mold. Next we paint the robot, wire the Arduino, write the code, and start playing with the remote control robot!

For More Information visit: www.ComposiMold.com

Sunday, May 5, 2013

The Power of ComposiMold to Clone Anakin Skywalker


In this twisted and completely made up turn of events, Anakin Skywalker is being cloned to make the next Clone Army.  This video demonstrates how the new clone army is to be made using ComposiMold Reusable Mold Making material and a urethane resin.

The process begins by dipping the Jedi master shape into a Bubble Buster solution. This Bubble Buster can also be sprayed. The Bubble Buster reduces surface tension so the bubbles do not stay attached to the surface of the Jedi Master.

He is then placed carefully into the cloning box, also known as the mold box, or in this case a plastic cup.
The Cloning solution, ComposiMold, is first melted with electromagnetic radiation using a specialized heating system called a microwave. The melted ComposiMold is poured over the Jedi Master. A toothpick or paperclip can be used to pull bubbles away from any areas where bubbles may stay such as in undercuts or sharp corners.

When Anakin is completely covered, the mold cools to solidify. This cooling took approximately 1 hour at room temperature. The Jedi Master is removed from the ComposiMold mold. To help make the part easier to remove, a slice was cut along the back. The process was started with scissors, but a scalpel ended up being a little easier.

Each action figure must be made to look like the first to create the new army is to be constructed.
Because we are using a very fast curing urethane resin in this cloning process, the mold must remain as cold as possible so as to not melt the ComposiMold. We will place the mold in the freezer prior to pouring in the urethane to reduce the temperature of the mold.

The sides of the mold are taped shut again to keep the mold together and the urethane in.
Spray the mold with mold release and let the mold release completely dry before pouring in the urethane resin.
After the ComposiMold mold has been in the freezer for about 30 minutes, pour the urethane resin into the mold. Place the mold back in the freezer while the urethane cures. This will slow the curing time slightly, but not much. The entire process takes approximately 10 to 20 minutes depending on the urethane used.
Anakin has now been cloned! But does the new clone also have the power to control the force or just Anakins good looks?
Thank you and may the force be with you!
For more information visit: www.ComposiMold.com
To order the urethane resin used in this video, PureCast, visit: http://compositherm.com/2pu.html

For More Information visit:www.ComposiMold.com  
www.Facebook.com/ComposiMold
www.YouTube.com/ComposiMold
order at www.ComposiTherm.com