Showing posts with label polyurethane casting. Show all posts

Wednesday, December 14, 2016

Urethane Resin Casting for Awesome Molds

Use either ComposiMold or ImPressive Putty for Urethane castings.

Many people use urethane resins because of their versatility and relatively simple use. Most urethane casting materials are 1:1 mixes with short casting times ranging from 1 to 30 minutes. Urethane plastics are used for making models, prototypes, crafts, and art pieces. 
Polyurethane resin casting in ComposiMold

Urethane resin in ImPRESSive Putty

Quick tip for success with urethane casting resins and ComposiMold:
With ImPRESSive Putty, faster cure urethane casting resins work really well. The mold making putty can handle the higher temperatures of the fast cure urethanes. 

For ComposiMold, choose a urethane with a longer cure time. These create less heat as they cure. You can also experiment with freezing the mold prior to pouring higher temperature urethane resins. Be sure to use talc powder/baby powder as your mold release before each casting made.

ComposiMold works very well with many urethane resins. However, there are two potential issues with some urethanes:
  • Some fast cure urethanes create a lot of heat when they cure, which can melt the ComposiMold. You can work around this by chilling your mold first, adding fillers into the urethane before casting, or pouring the resin in intervals.
  • Some urethanes are very sensitive to moisture. Use talcum powder as a mold release to reduce any moisture from the mold from reacting with the urethane.
  • Use a mold release that is designed for polyurethane casting.

ComposiMold has two urethane resins available that we believe work very well with ComposiMold:

Urethane resins require dry fillers. Any water will create bubbles and heat. If you using powdered fillers in the polyurethane, dry the material in the oven at low temperatures for 15 to 30 minutes prior to mixing. 
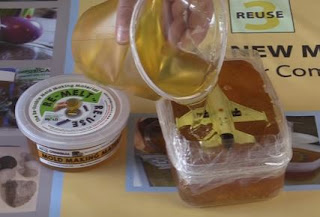
Pouring ComposiMold mold for resin casting

Making wheels from Urethane resin in ComposiMold mold


Visit Polyurethane Casting with ComposiMold for videos.

Please share this video and tell everyone you know about ComposiMold! Plus subscribe to see the next amazing blog post from ComposiMold!


Monday, June 10, 2013

To Mold and Cast a Rubber Ducky into a Plastic Duck using ProtoCast and ComposiCast Urethane Resin


This is a simple one part mold of a rubber duck. To stop the rubber duck from floating when the ComposiMold is poured over it, clay and sand was put inside the rubber duck. It also could have been glued down with hot glue to the bottom of the container.

The part was then coated with Bubble Buster to reduce bubbles from adhering to the part. We dip it into the Bubble Buster, but we could also have sprayed it on. Be sure to get it into any crevices.
The duck is placed inside a mold box. We used a PVC pipe, but any container that can handle a little heat will do. You can also use legos to build a box or aluminum foil that has been sprayed with a mold release also works well.

Melt the ComposiMold and pour over your part. To melt the ComposiMold, follow the direction on the label. Melt in short intervals until you are comfortable with how it melts in your microwave. You can also use a double boiler or a chocolate melter.

A toothpick or paperclip can be used to pull bubbles away from any areas where bubbles may stay such as in undercuts or sharp corners. In this case, we expect bubbles to adhere to the neck area and below the beak.

We don’t show it in this video, but the ComposiMold is cooled rapidly by placing it in the freezer. It took approximately 30 minutes to cool, but to ensure it was very cold before pouring in the urethane resin, we left the mold in the freezer for 2 hours.

You then remove the duck from the mold and spray the inside of the mold with a mold release that is designed for urethane resin.

The ProtoCast urethane resin is a bright white plastic with a demold time of 15 to 20 minutes.
While the mold is still cold, pour in a PrototCast Urethane resin. The urethane is mixed 1:1 by volume.

If necessary, place ComposiMold back into the freezer to keep the mold cold while the urethane is curing. This helps reduce any melting of the ComposiMold from the exothermic reaction from the Urethane. Longer cure time resins have less of this heat.

At this time, the plastic duck is made. You can remelt the mold to make a new mold, or you can make another casting with the ComposiMold mold.

Here we also show the plastic duck made with ComposiCast urethane resin. It works the same way. Be sure to keep the mold cool if necessary throughout the process.
  • The keys to success for a urethane casting is to use Bubble Buster when making your mold
  • Keep the ComposiMold cold throughout the process
  • Use a mold release designed for urethane resin and make sure it is completely dry.
  • And if possible, use longer cure time resin systems.

Thank you!

For More Information visit: 
order at 

Saturday, May 29, 2010

See no evil-Urethane Frogs cast with ComposiCast


Here are three frogs that were made with ComposiCast urethane resin. These pieces are approximately 7 inches high and about 3 inches in diameter.

Three different mold making techniques were used.

The first consisted of simply placing the original frog casting into a container and pouring ComposiMold around it. After the ComposiMold solidified by cooling, Urethane resin was poured in. The urethane is the ComposiCast resin sold through ComposiTherm.com. Because of the large size, the urethane heated up and partially melted the ComposiMold. The part still worked, but the mold was only good for one cast.

In the second approach. ComposiMold was brushed on to the original frog figurine. After about 1/2 inch around the part, it was peeled off. The urethane was poured in small amounts and allowed to cure. Because smaller amounts were used, it did not melt the ComposiMold mold making material.

The third method combined ComposiMold with a silicone brush-on material. Two layers of silicone brush-on material was used to coat the frog. Because the brush-on material is not stiff enough to hold its shape without a backing material, ComposiMold was poured around the part. The original part was removed and urethane was poured into the mold (consisting of a thin layer of silicone and about an inch thick ComposiMold). Latex or urethane rubber could also have been used for the brush-on material.
To see more ComposiMold images check out the web album at: ComposiMold Mold Making

www.ComposiMold.com

Wednesday, December 16, 2009

Christmas Santa Gets Help with ComposiMold Mold Making Material


Here's a nice Santa Clause. The original ornament was on our mantle. Now we have two Santas.
Here is the Santa being molded and cast. The original Santa is inside the ComposiMold. After the ComposiMold solidified, the part was removed, a mold release was sprayed into the mold cavity and the polyurethane was poured into the mold to make the duplicate.


Happy Holidays.


Thursday, September 10, 2009

Casting a soldier using ComposiMold and Polyurethane


A customer asked about using ComposiMold to cast plastic soldiers. I thought I would show an examples of this.

Making a Toy Soldier Using a Two Part Poured Block Mold.


This plastic soldier has been a toy for several generations. The people who designed it did an amazing job. It is a great example of how to design a part for good casting. I expected it to be a large casting using a lot of resin, but when I molded it, it used very little. The body of the soldier turns out to be extremely thin to use less resin. Also, all the components are facing down so that it would be easy to fill with the resin without air pockets forming.


For more details about how this soldier was cast check out the tutorial...

http://composimold.com/files/how-to-make-Toy-Soldier-two-part-block-mold-ComposiMold.pdf


www.ComposiTherm.com