Showing posts with label brush on molds. Show all posts

Wednesday, September 7, 2016

Brush On/Pour On Method for Making Molds of Relief Sculptures


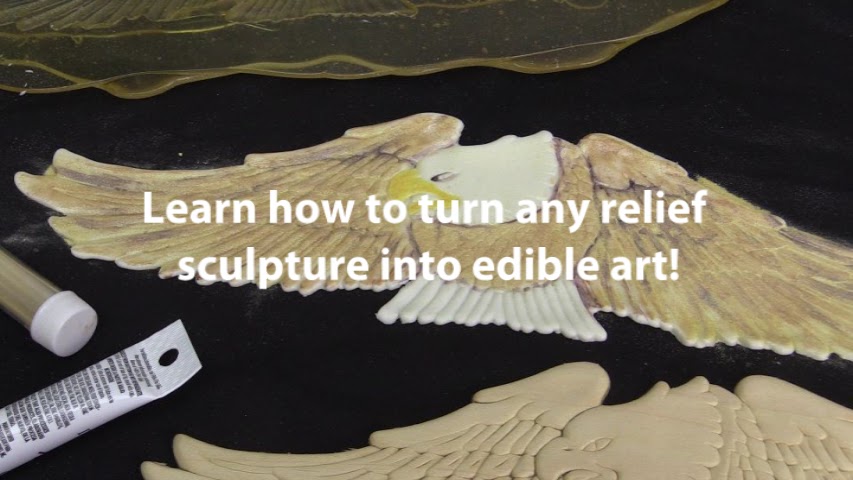
Could making a mold with ComposiMold get any easier?! Why, yes it could. We'll show you how to make a mold of a relief sculpture (flat shape) by just pouring or brushing melted ComposiMold onto it without even using a mold box. 

https://youtu.be/JDuXJ9y6Otw

Supplies:
ComposiMold-Food Contact
Fondant
Relief Sculpture
Toothpick
Edible Paints

Instructions:
1. Place your clean relief sculpture on a surface that ComposiMold can easily be peeled away from. In this example we use a piece of glass. (Paper surfaces are not ideal)

2. Melt your ComposiMold-FC in the microwave per the instructions included in the container. 

3. Pour a thin layer of CM-FC over the object. Be sure it covers the entire surface including the edges. 

4. Look closely for any bubbles that may have been trapped on the surface of your original object. Use a toothpick to pull the bubbles off the surface. You don't need to pop them or try to completely remove them, just be sure they are not touching the surface of the relief sculpture. 

5. Let the 1st layer cool until firm to the touch again. A thin layer such as this took less than 20 mins to cool. 

6. Pour your next layer over the first. This layer adds firmness and strength to your mold. All the detail was captured in the first layer. Be sure the entire thickness of the mold is at least 1/4" to 1/2".

7. Let this layer cool. 

8. Peel the ComposiMold-FC mold off of the original piece and flip it over onto a flat clean surface. 

9. Soften the fondant of your choice, roll to 1/8", and transfer to your mold. Press into all the details and edges of the mold. 

10. Rub excess fondant away from the edges of the final fondant piece to cut the extra away. (See video)

11. Then gently roll the final edges back towards the final fondant piece to make them neat when the piece is flipped over. 

12. Carefully flip the mold and fondant over. Then lift one edge of the mold back and away from the fondant. Slowly bend/peel the mold away from the fondant to reveal your edible creation. 

13. Paint and decorate the fondant shape with edible materials. Wrap it around the side of a cake, drape over a cupcake, or showcase it on its own!

14. Make as many fondant creations as you need or pour melted chocolate into your mold to make a different version. 

15. Wipe away any fondant or chocolate from the mold with a cold damp cloth, re-melt the ComposiMold, and store covered until your next project. 

Here is a link to a video tutorial of the same project: https://youtu.be/JDuXJ9y6Otw


Please share this video and tell everyone you know about ComposiMold! Plus subscribe to see the next amazing blog post from ComposiMold!


Wednesday, July 1, 2015

How to Use a Wallpaper Scrap to Make a Fondant Cake Wrap Texture

Easily transfer interesting textures onto the side of your cake with a ComposiMold mold. In this example, we used a scrap piece of textured wall paper to make our mold. 

 
1. Glue the entire back side of the paper to a perfectly flat heat safe mold box. (You can make any shape and depth mold box with tin foil.) Be sure the surface you are resting the mold on is level and perfectly flat.

2. Coat the textured paper and inside of the mold box with Food Contact Safe Mold Release. Wipe away any excess. 

3. Melt ComposiMold-FC (food contact) per instructions on the lid. Do not let it boil, as this will introduce too many bubbles.

4. Pour the ComposiMold-FC into your mold box to cover the paper by at least 1/2".


5. Let the mold cool and solidify on the flat surface.

6. Pull the mold away from the tin foil and then remove the wallpaper from the mold. 


7. Trim any rough edges of the mold with a clean knife or kitchen scissors. 

8. Soften your fondant and press it into the mold. Using a rolling pin eliminates the added heat of your fingers which may warp your fondant casting. 

 
9. Trim the edges of your fondant cake wrap and apply to the cake. 

10. You can also pick up details in the mold to decorate the top and sides of the cake.

 The possibilities are endless. You can find textures to mold everywhere you look. If you are not able to put the texture you want to duplicate into a mold box due to it's location, you can use a different method called: the Brush On Method. This allows you to brush melted ComposiMold onto a texture in place. One example is an instance where we wanted to duplicate a flower detail on the back of a lawn chair. After washing the plastic chair with soap and hot water we followed the steps to create a mold with this technique. Then we were able to make white chocolate castings in this mold. See how the possibilities are endless?!

White chocolate flower made in a mold of a detail on a lawn chair. The Brush On Method was used here.


Please share this video and tell everyone you know about ComposiMold-FC! Plus subscribe to see the next amazing blog post from ComposiMold!

For More Information Visit: 

Friday, April 10, 2015

Candle Making Tutorial: Make Your Own Da Vinci Candle Soy Wax and Compos...

Leonardo Da Vinci as a candle. Here we use a bust of Da Vinci to show you a cool process for duplicating your part into a cool soy wax candle.


 For More Information Visit:

www.ComposiMold.com,

www.Facebook.com/ComposiMold,

www.YouTube.com/ComposiMold


Sunday, November 3, 2013

ComposiMold Brush-on Mold Making Technique: When a mold box isn't an option


Sometimes the shape you want to duplicate cannot be placed into a mold box to make the mold. Here we show you a brush-on mold making process using the re-usable mold making material, ComposiMold. The rose pattern was found on the back of a plastic chair and we wanted to make a chocolate from it.

So first we cleaned the chair well before placing a thin layer of ComposiMold over the shape. If necessary, use touch of vegetable oil as a mold release. The ComposiMold is melted in the microwave using the direction on the label.

The process for the brush-on mold making technique works by building up successive layers. Each layer cools prior to putting on the next layer. To make it go faster, let the ComposiMold cool so it is thicker before pouring or brushing onto your shape.

The thickness of your mold depends on what you are molding. For larger molds, build up a thicker mold to provide additional strength. The mold can also be backed up with more ComposiMold after it has been removed from your master shape.

With this Brush-on technique, you can make molds of objects hanging on walls or even upside down. The best approach for these more complex placements, is to keep the ComposiMold closer to its melting temperature of 130 F. This way the ComposiMold will be thicker and won’t drip as much.

For this rose mold, we built up approximately ¼ inch of ComposiMold. The ComposiMold mold is now carefully pulled off of the master shape on the chair. Any extra ComposiMold can be re-melted and re-used for your next mold.

The mold is now ready for casting. We used a white chocolate to make the flower.
For more information, visit ComposiMold.com
Thank you.


For More Information visit:
www.ComposiMold.com
www.Facebook.com/ComposiMold
www.YouTube.com/ComposiMold